

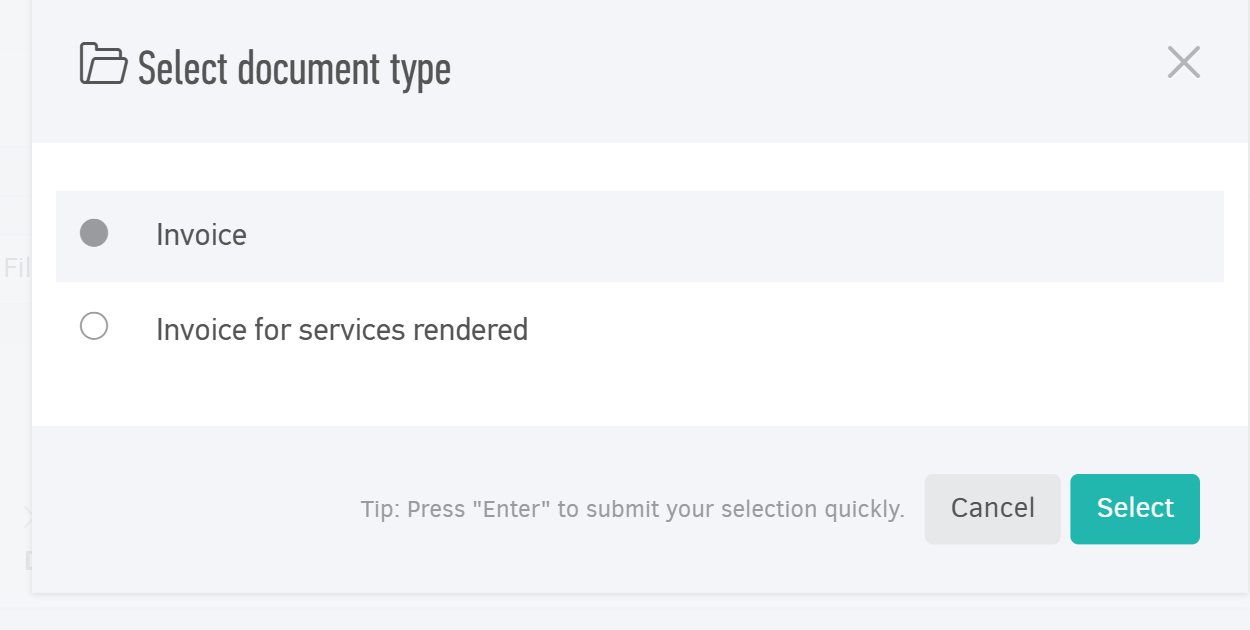
Creating your invoices is a central feature in Elorus. To access the functionality from the main menu, select Invoices > Add. If you have more than one document type (Settings > Document types), a pop-up will appear asking you to choose the type you want to issue. Click Select to confirm your choice.
You can customize the invoice layout in Templates or adjust related settings
Select your client
This is the mandatory first step, before any other information is added on the invoice.
You can select them from your list of existing contacts or add them on the spot. Start typing their name and see related entries appear on the top of the list to help you select.
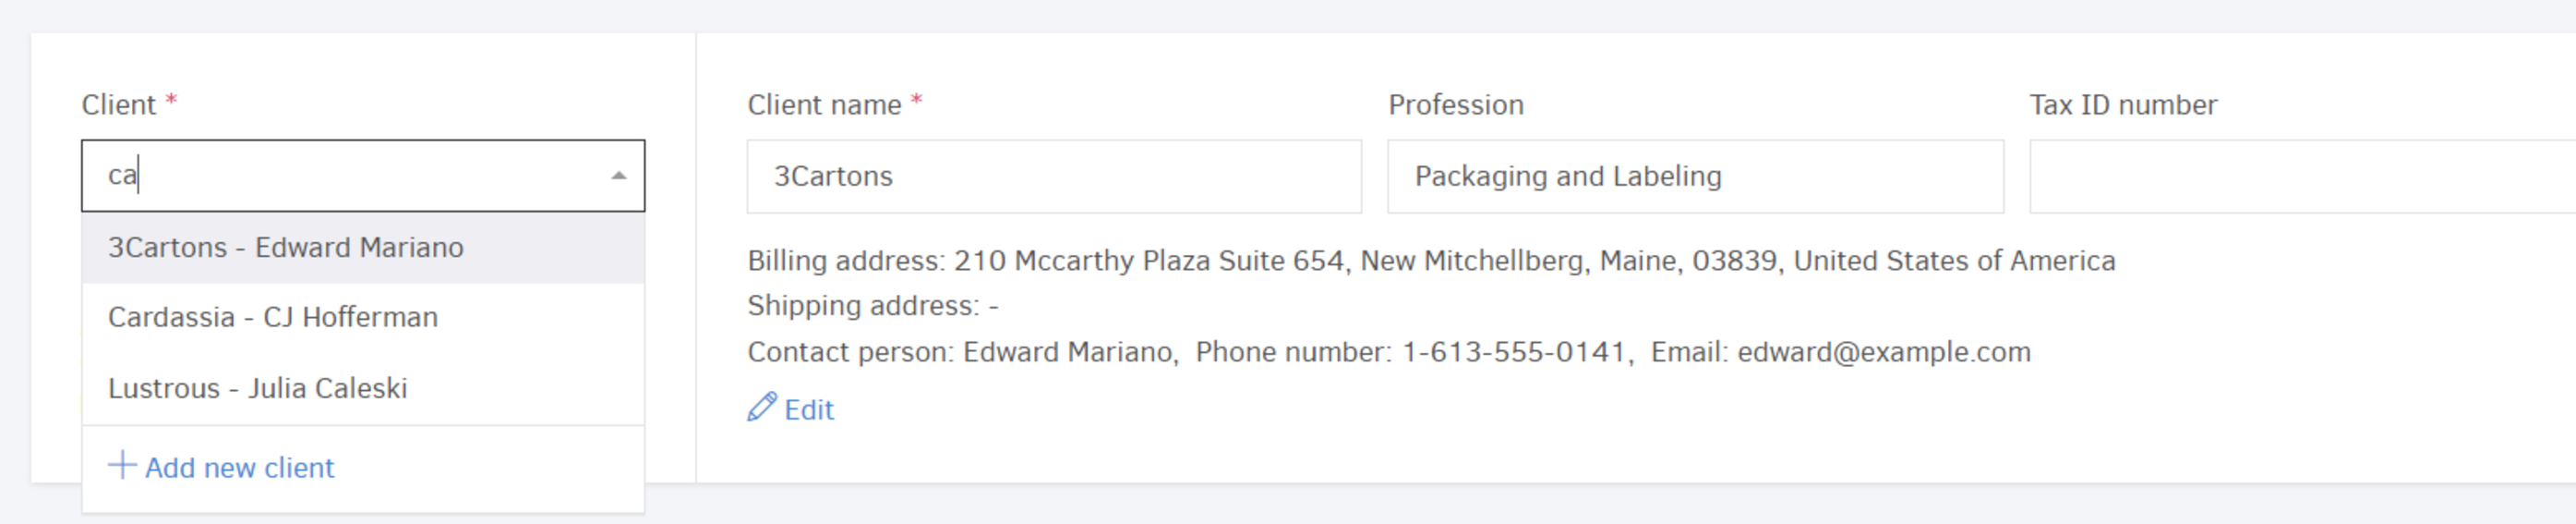
By clicking +Add new client you can create a new contact on the spot.
If you have set default currency for the client, it automatically becomes the currency of the invoice (unless you select a different one on the spot). The same applies to the template or any default taxes set in the contact. You will find more details in the Currency and amounts paragraph below.
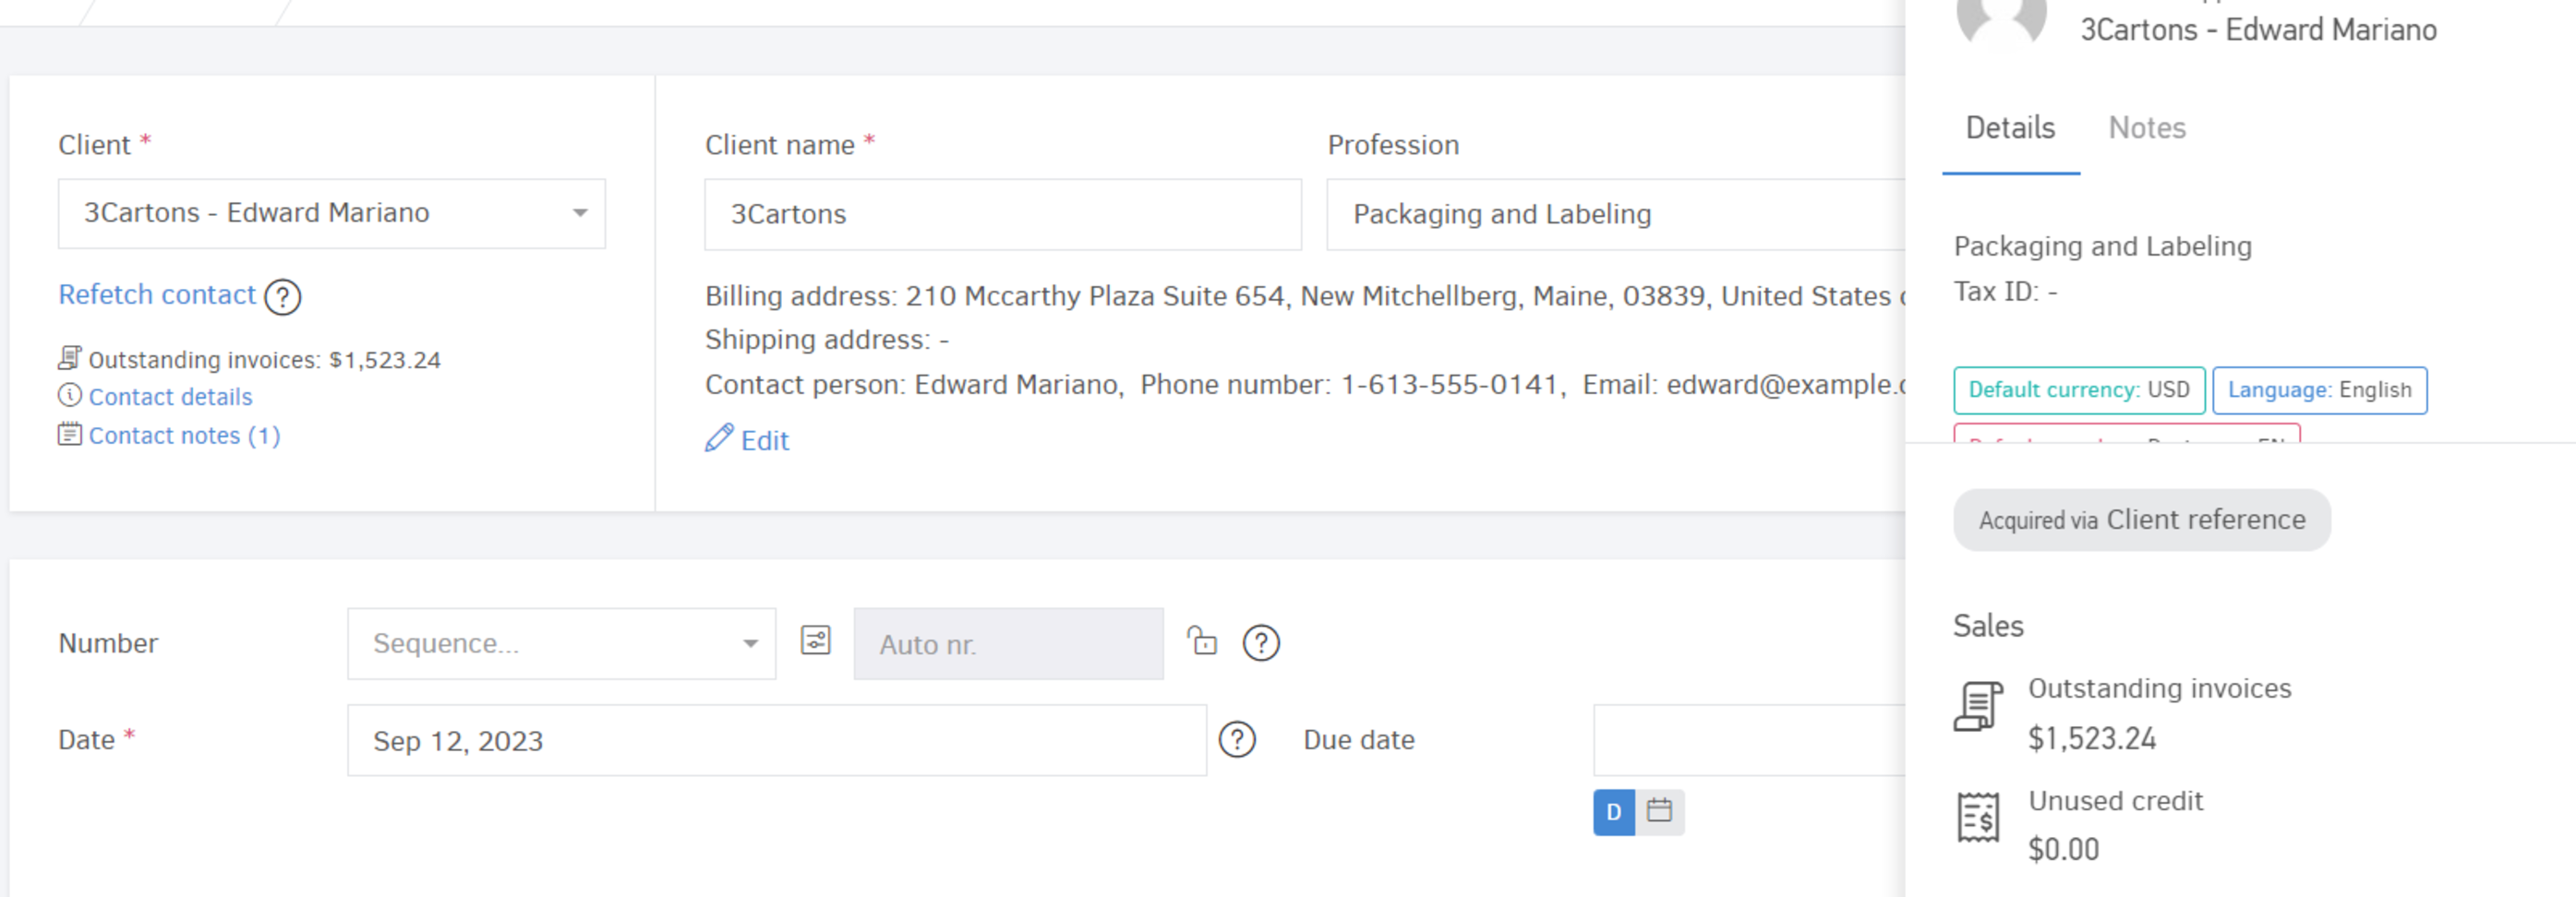
By clicking Contact details you can view all the information related to your client, as well as any outstanding invoices or unused credit that they have. By tapping on the contact Notes option you can see private notes related to the customer.
Document type and Numbering
If you have more than one document type (i.e. both sales invoice and invoice of rendered services) you will see a document type field. This allows you to change types from the available ones on the list.
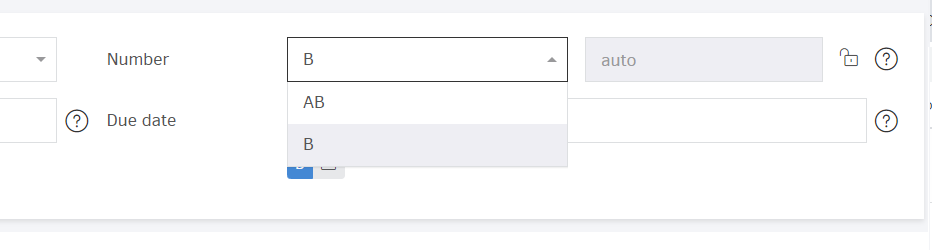
You can then apply a numbering sequence to your invoice from the Number field. If you have issued 4 invoices already, without any sequence, and then add one with sequence 'A' selected, the new invoice will be numbered A-1 by Elorus.
If this is the first invoice issued in Elorus and you need to continue your numbering, read related article.
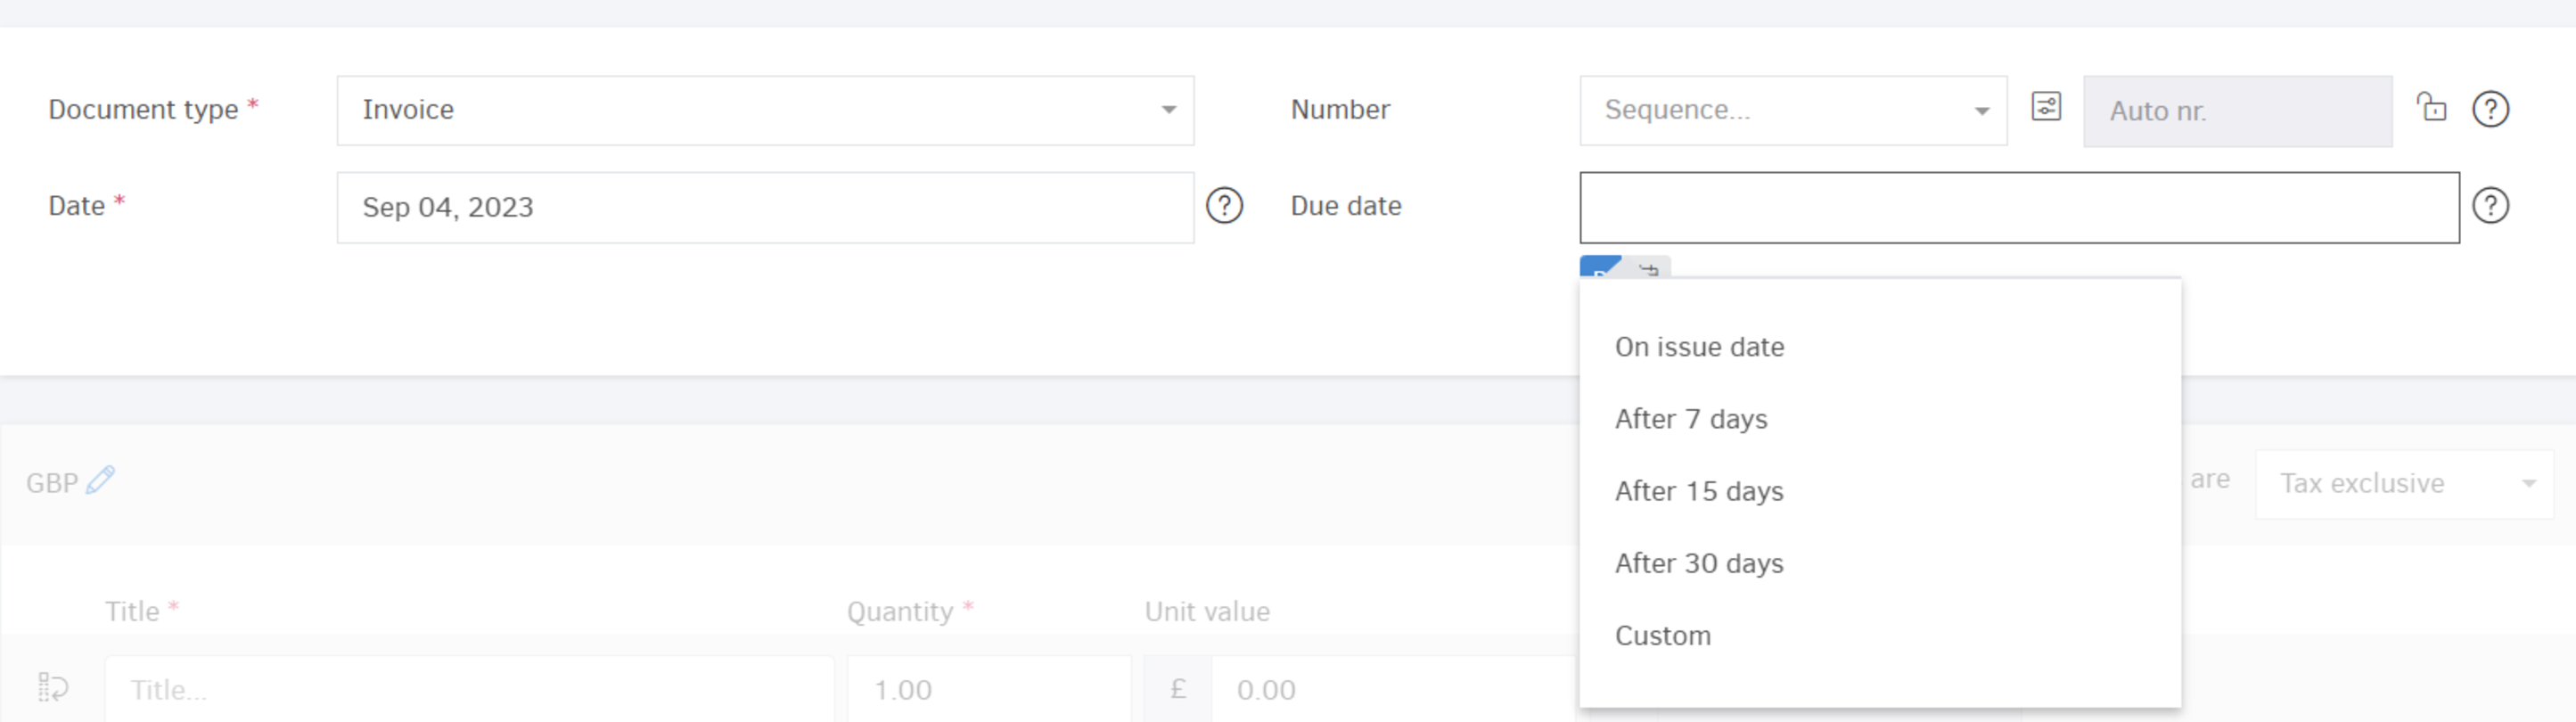
Date and Due date
Elorus reads your device date and uses it as default date of issue. You may simply click inside the field to choose a different one from the calendar or by typing in.
Optionally, you can set a due date. Use it to apply a certain credit period or set up a due date yourself, by clicking on the calendar.
When that day comes, for which you will be notified, Elorus will mark the invoice as Overdue, a status available for filters and reminders.
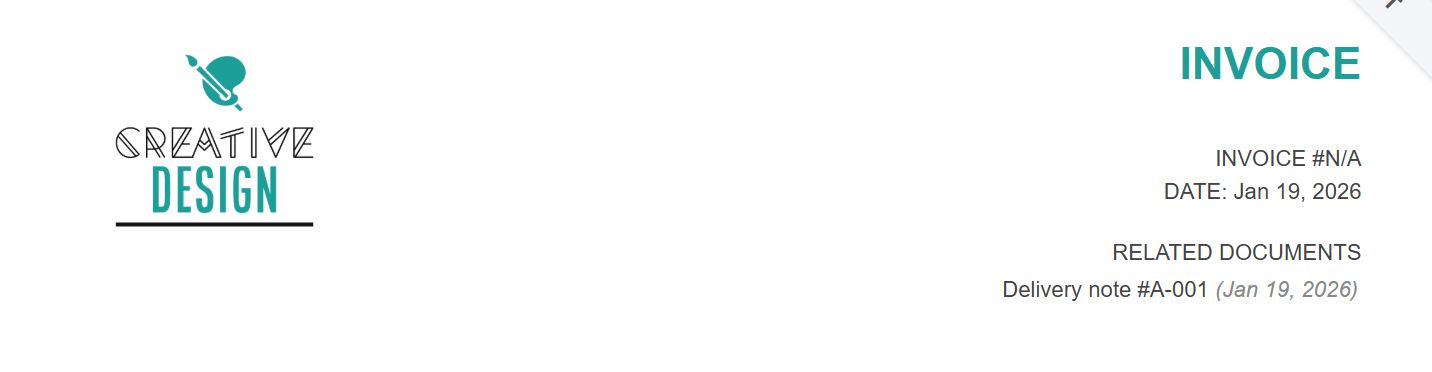
If you issue Delivery notes, you can link an invoice to one or more delivery notes, by clicking on the relevant field.

The delivery notes linked to the invoice are also displayed on its printable version.
Currency
Elorus uses your organization base currency as default. In case you have set a default currency for your client, inside the contact, this gets priority and gets automatically selected. You may still set a different currency for any invoice individually from the pen icon:

Elorus supports multiple currencies, so any selection above is not restrictive for future invoices issued to the same client.
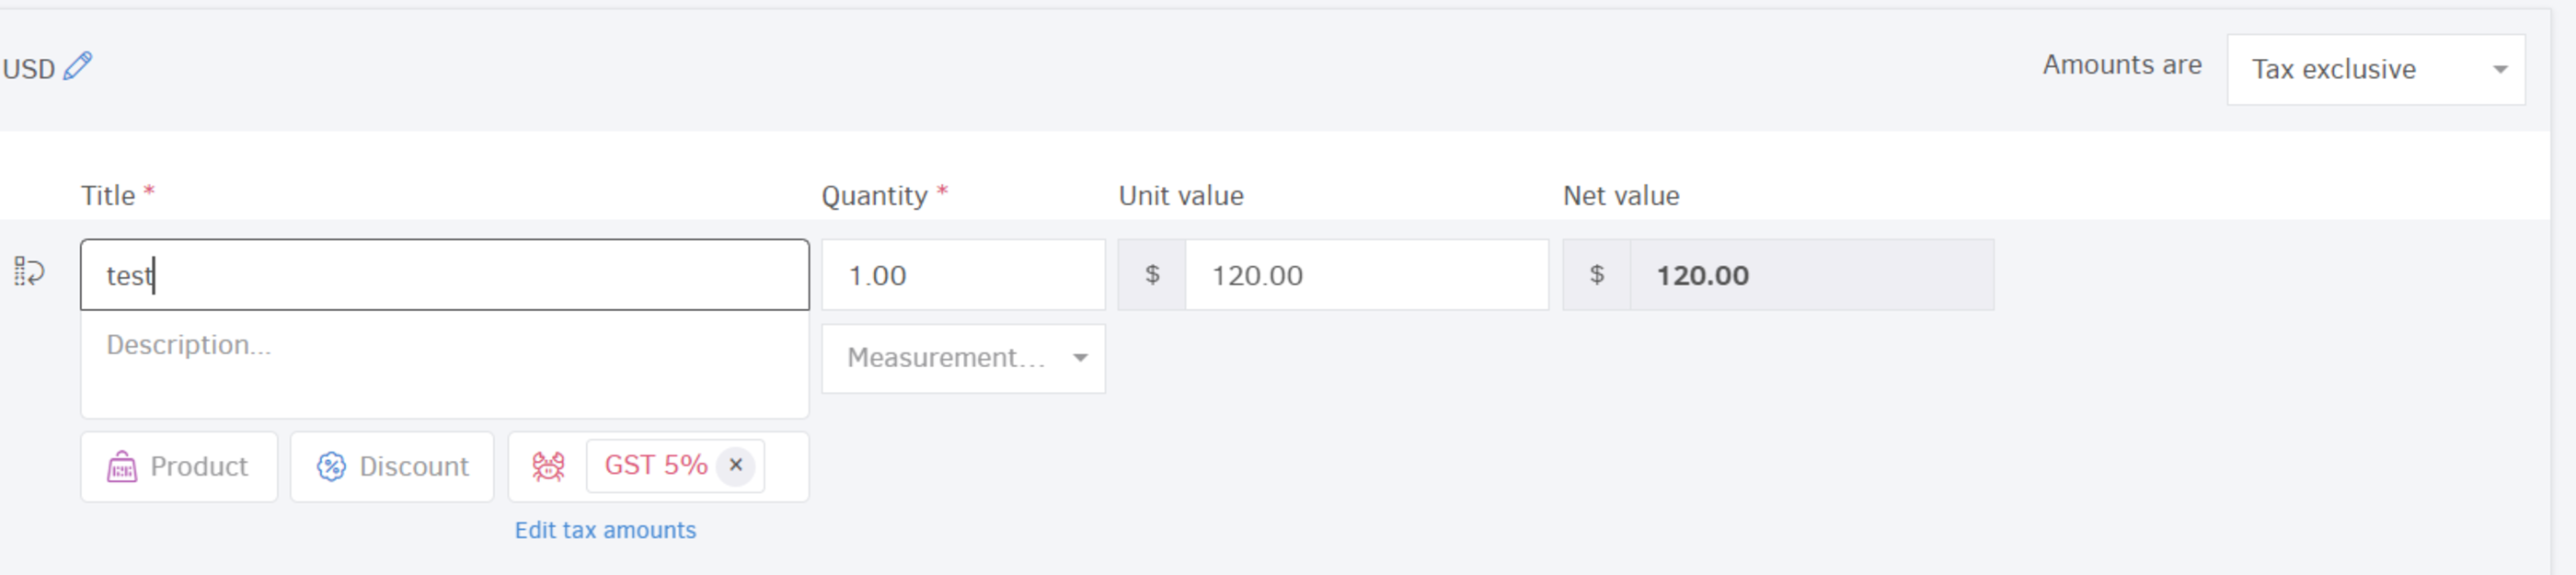
Amounts are: Calculator mode
From the Amounts are field, you can decide how Elorus will calculate taxes for your products/services:
- Tax exclusive: The user enters the unit price (net price); taxes and discounts are calculated separately.
- Tax inclusive, after discounts: User enters the final unit price, with taxes and discounts already included.
- Tax inclusive, before discounts: User enters the gross unit price (including tax); discounts are then applied separately.
For more information visit the related article.
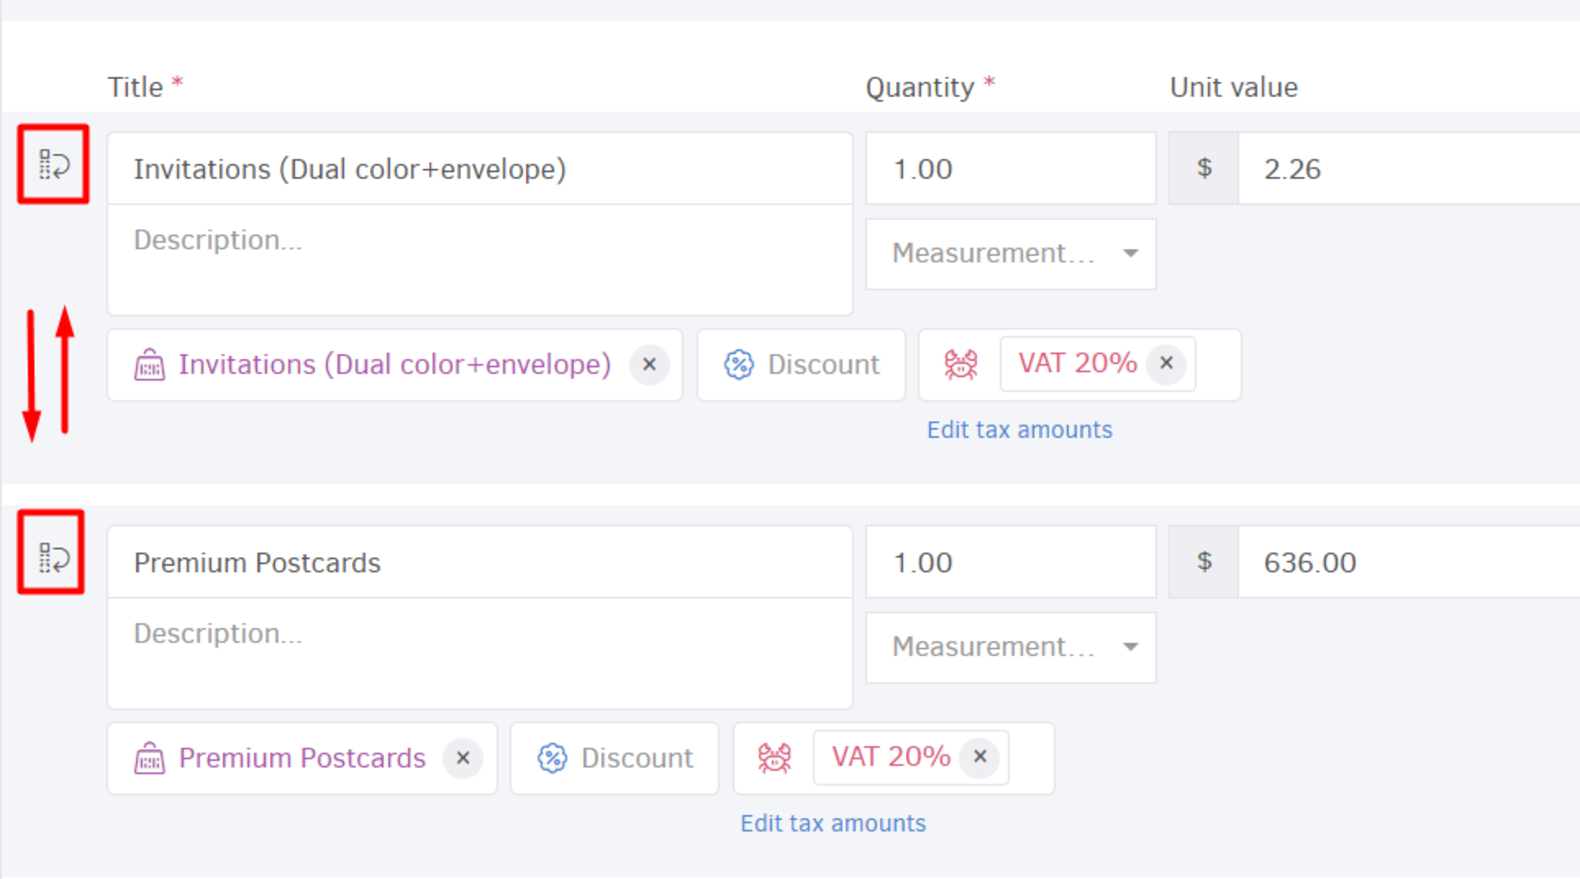
Items table
There is no invoice without products or services, meaning that this field must be filled in. Enter items from your products inventory/list of services or submit new ones manually by typing in Title, Value, and optionally Description. You may also include Taxes and discounts.
Each line of a sales document includes the following fields:
-
Title (product or service).
-
Line description (optional), as it will appear on the printable version of the document.
-
Quantity and unit of measurement.
-
Unit price of the product or service.
-
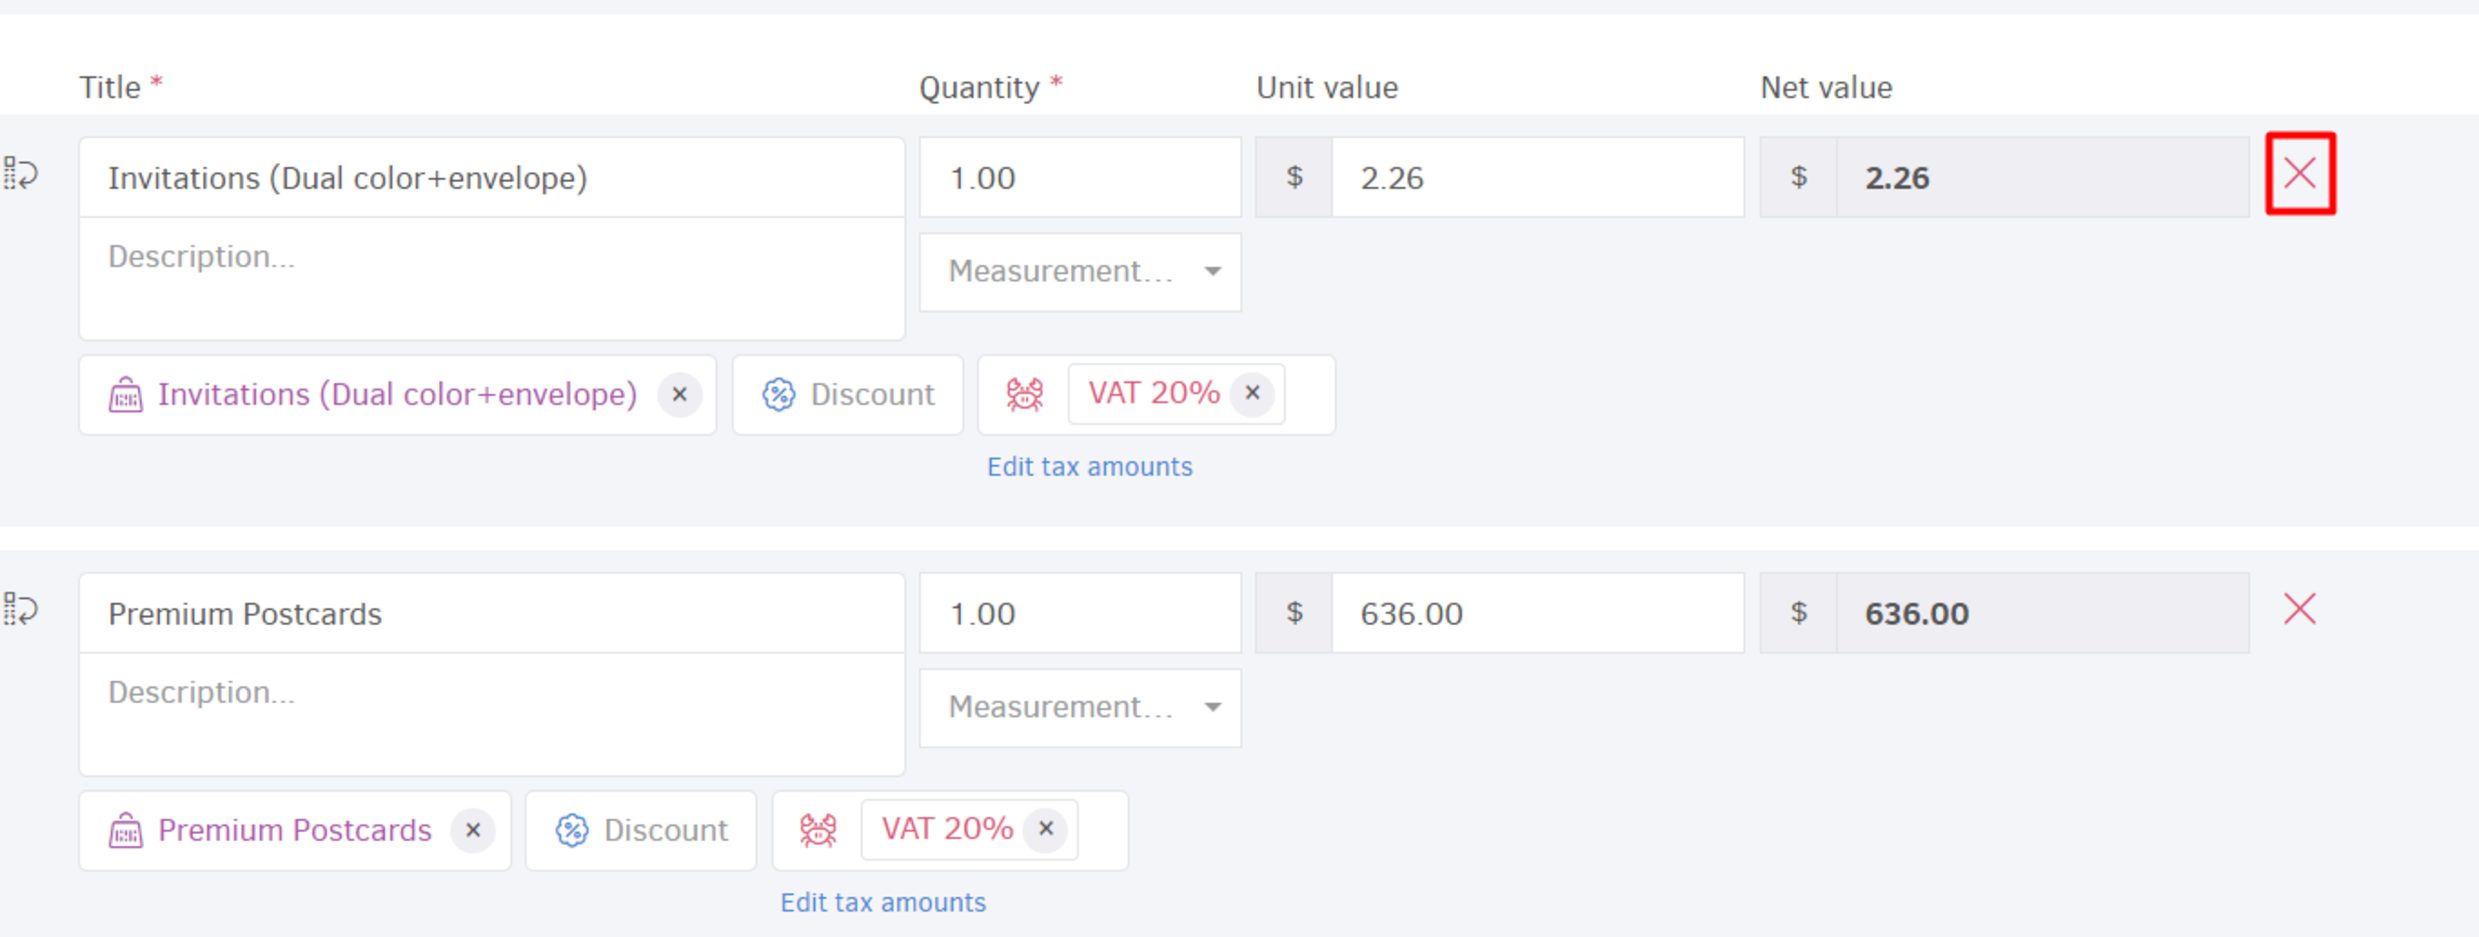
Net amount. The total net amount of the line is automatically calculated by the application.
-
Product/Service. If the transaction relates to an inventory item, you may associate the corresponding product/service with the document line. Upon product selection, the description, purchase prices, and applicable line taxes will be automatically populated based on the product’s information. Additionally, when the document is issued, the available stock will be adjusted according to the purchased quantity, provided that inventory management is enabled for the specific product/service.
-
Warehouse selection. If inventory management is enabled for the selected product, you may specify the warehouse from which the stock movement will be recorded.
-
Discount. Optionally, you may apply a discount to the original unit price, calculated either as a percentage or as a fixed amount. The discount may also be calculated as a gross amount, meaning it includes the applicable VAT, provided that you have selected the amounts on the document line to be calculated inclusive of taxes.
-
Line taxes. VAT as well as any other taxes applicable to the specific line.
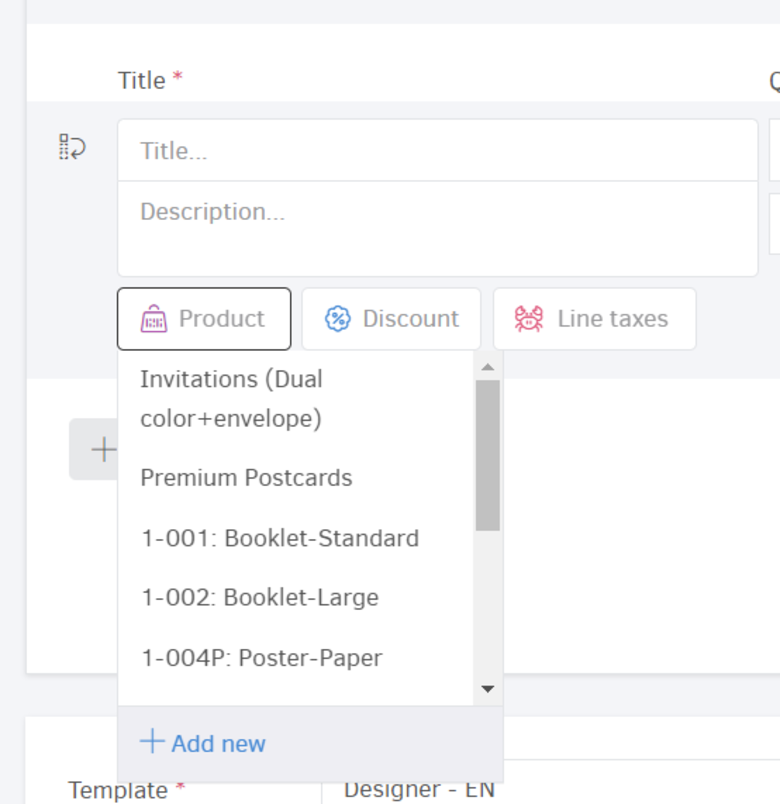
Choose a product/service
Click Product icon and start typing the item’s title or code; a drop-down list of products/services will appear for you to choose.
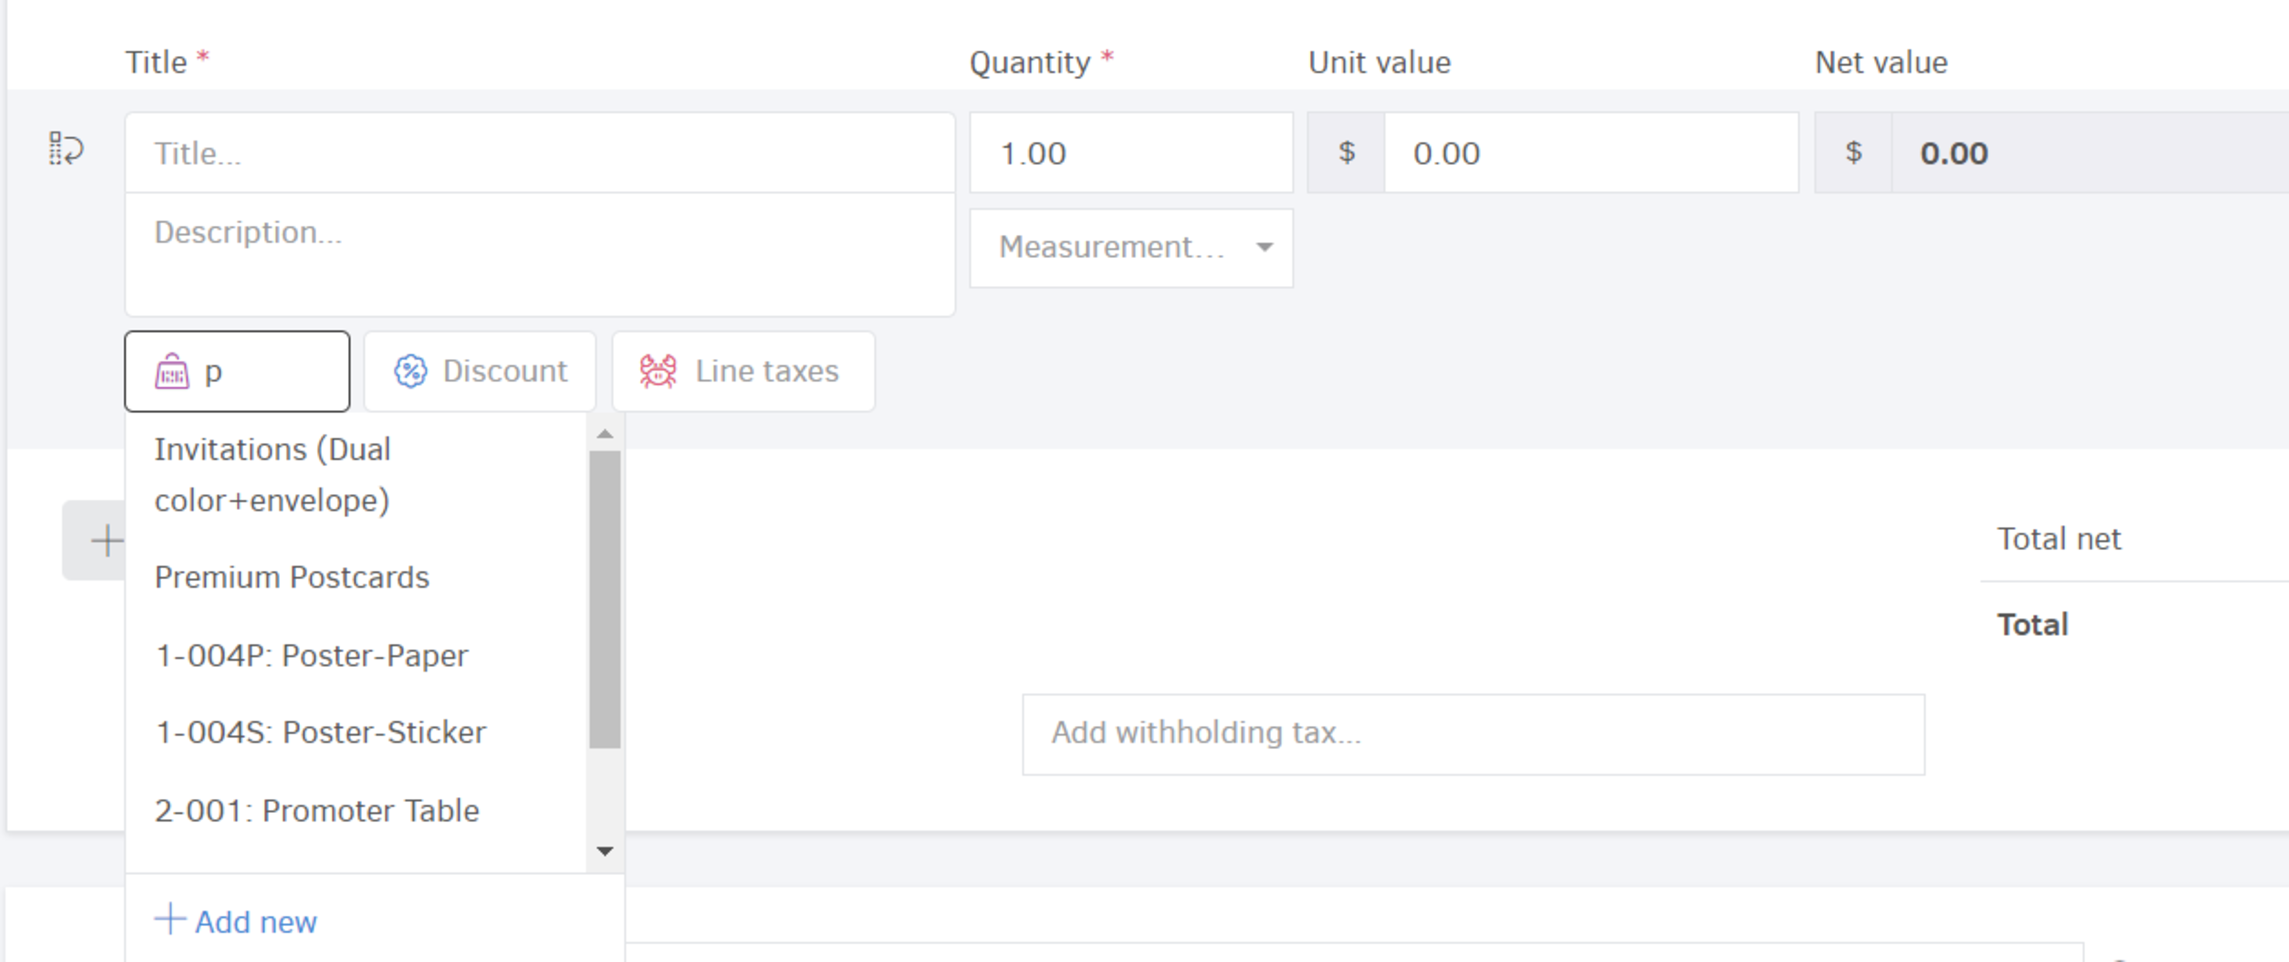
Once you select an item from the list:
-
Elorus will automatically fill in the rest of the item details (price, measurement, taxes, etc.).
-
Product Stock will be automatically adjusted (if enabled). In this case, the corresponding Warehouse should be selected in the relevant field.
-
If both of the product / service and the client selected have a default tax rate, the system gives priority to the one of the contact.
If there's a new product that you wish to add in both your invoice and your items list, click +Add new.
If you haven't already set tax rates for your products/services, you have to select one for every line in the items list.
Type your items manually
-
Set how the product / service will appear on the document. You may also add a detailed description simply by typing (in the description field).
-
Apply taxes from the related field.
Drag & Drop an item line, to change where items appear on the invoice, using the button shown below.
You can delete a line/product/service by clicking the x icon.
Just hit +Add new line for a new item / product / service.
- Taxes apply on each line / product separately. This practically means that each item has its own VAT rate.
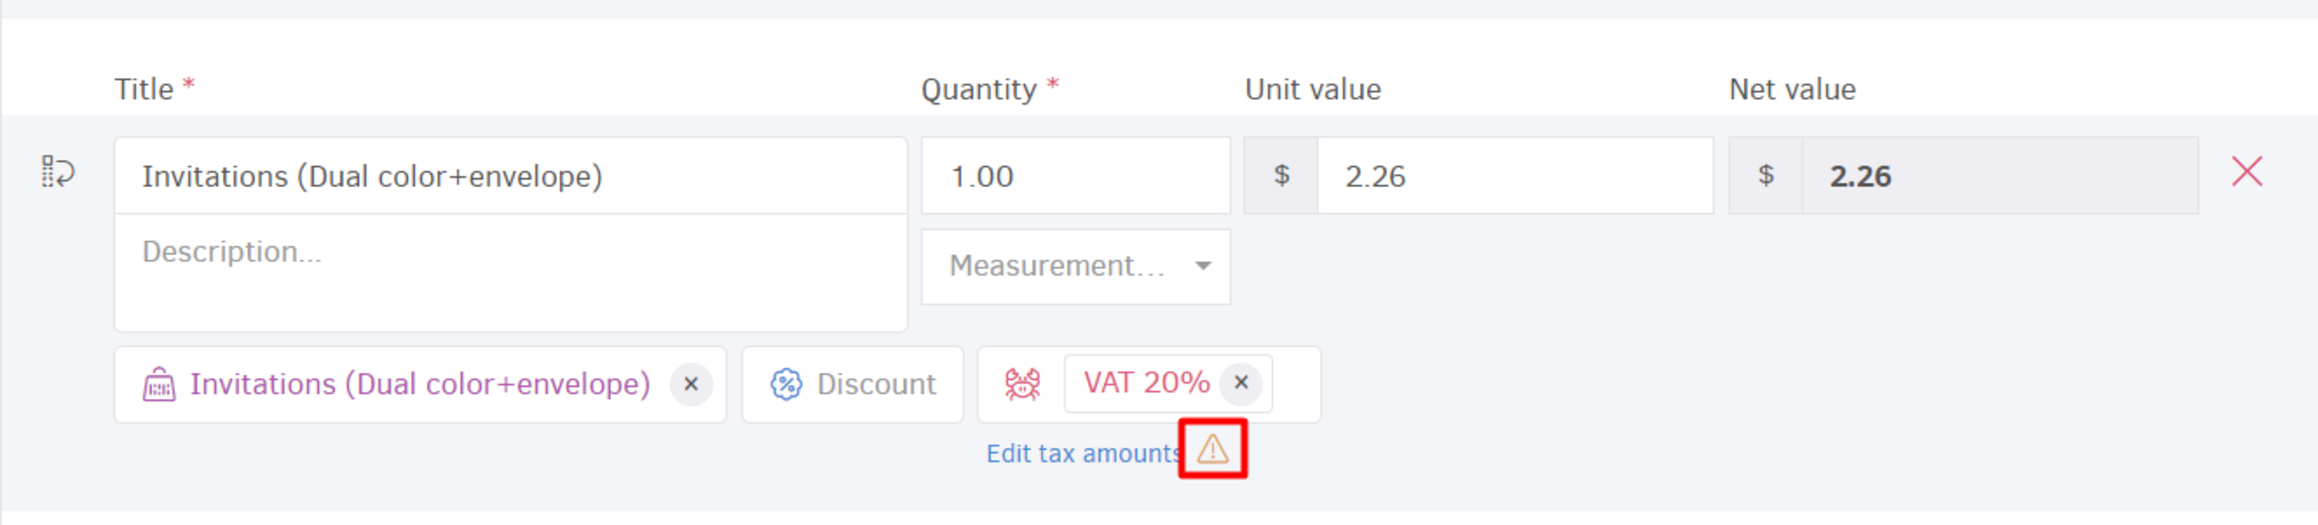
- You have the option to manually adjust the tax amount for each line on your invoices by clicking Edit Tax Amounts. Uncheck Auto-Calculate, specify the amount (up to 2 decimal places) and save. Elorus informs you that the line contains custom tax amounts.
Add global and withholding taxes
Underneath the product lines you'll find the Add global tax and Add withholding tax fields.
By clicking Add global tax you may apply taxes at the document level. When specified, Elorus will calculate this tax as if it had been applied to each line item individually, simplifying the invoicing process and ensuring accuracy.
When applied, its amount can be set manually, as well. Just click the padlock icon, and specify.
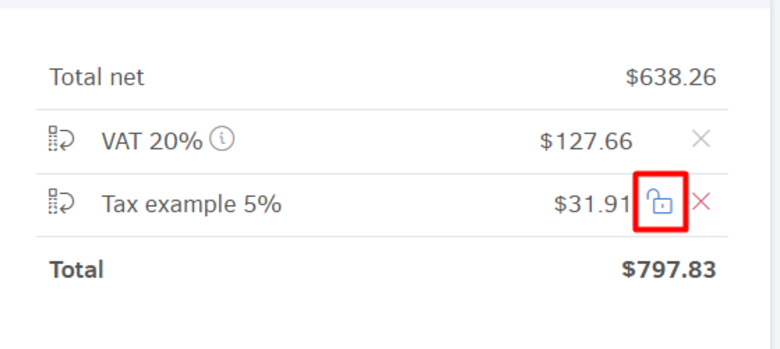
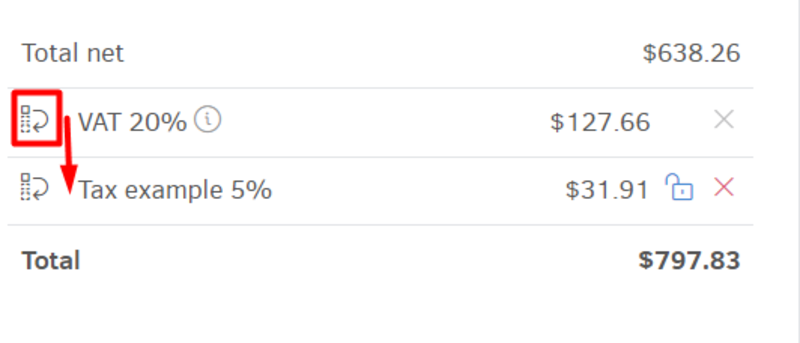
You can of course delete the global tax by clicking the x and change the order in which the taxes appear on the invoice printable with drag and drop option .
In the +Add withholding taxes field you can record the withholding tax that deducts from the invoice's amount payable.
Details on how to add a withholding tax you can find here.
VAT taxes and any other tax subject to VAT must not apply to Global taxes (document level).
Template - Public notes - Terms & conditions
The Template you choose sets the appearance of your documents, including the language in which the invoice will be issued.
Public notes and Terms & conditions can be pre-filled through the Templates menu.
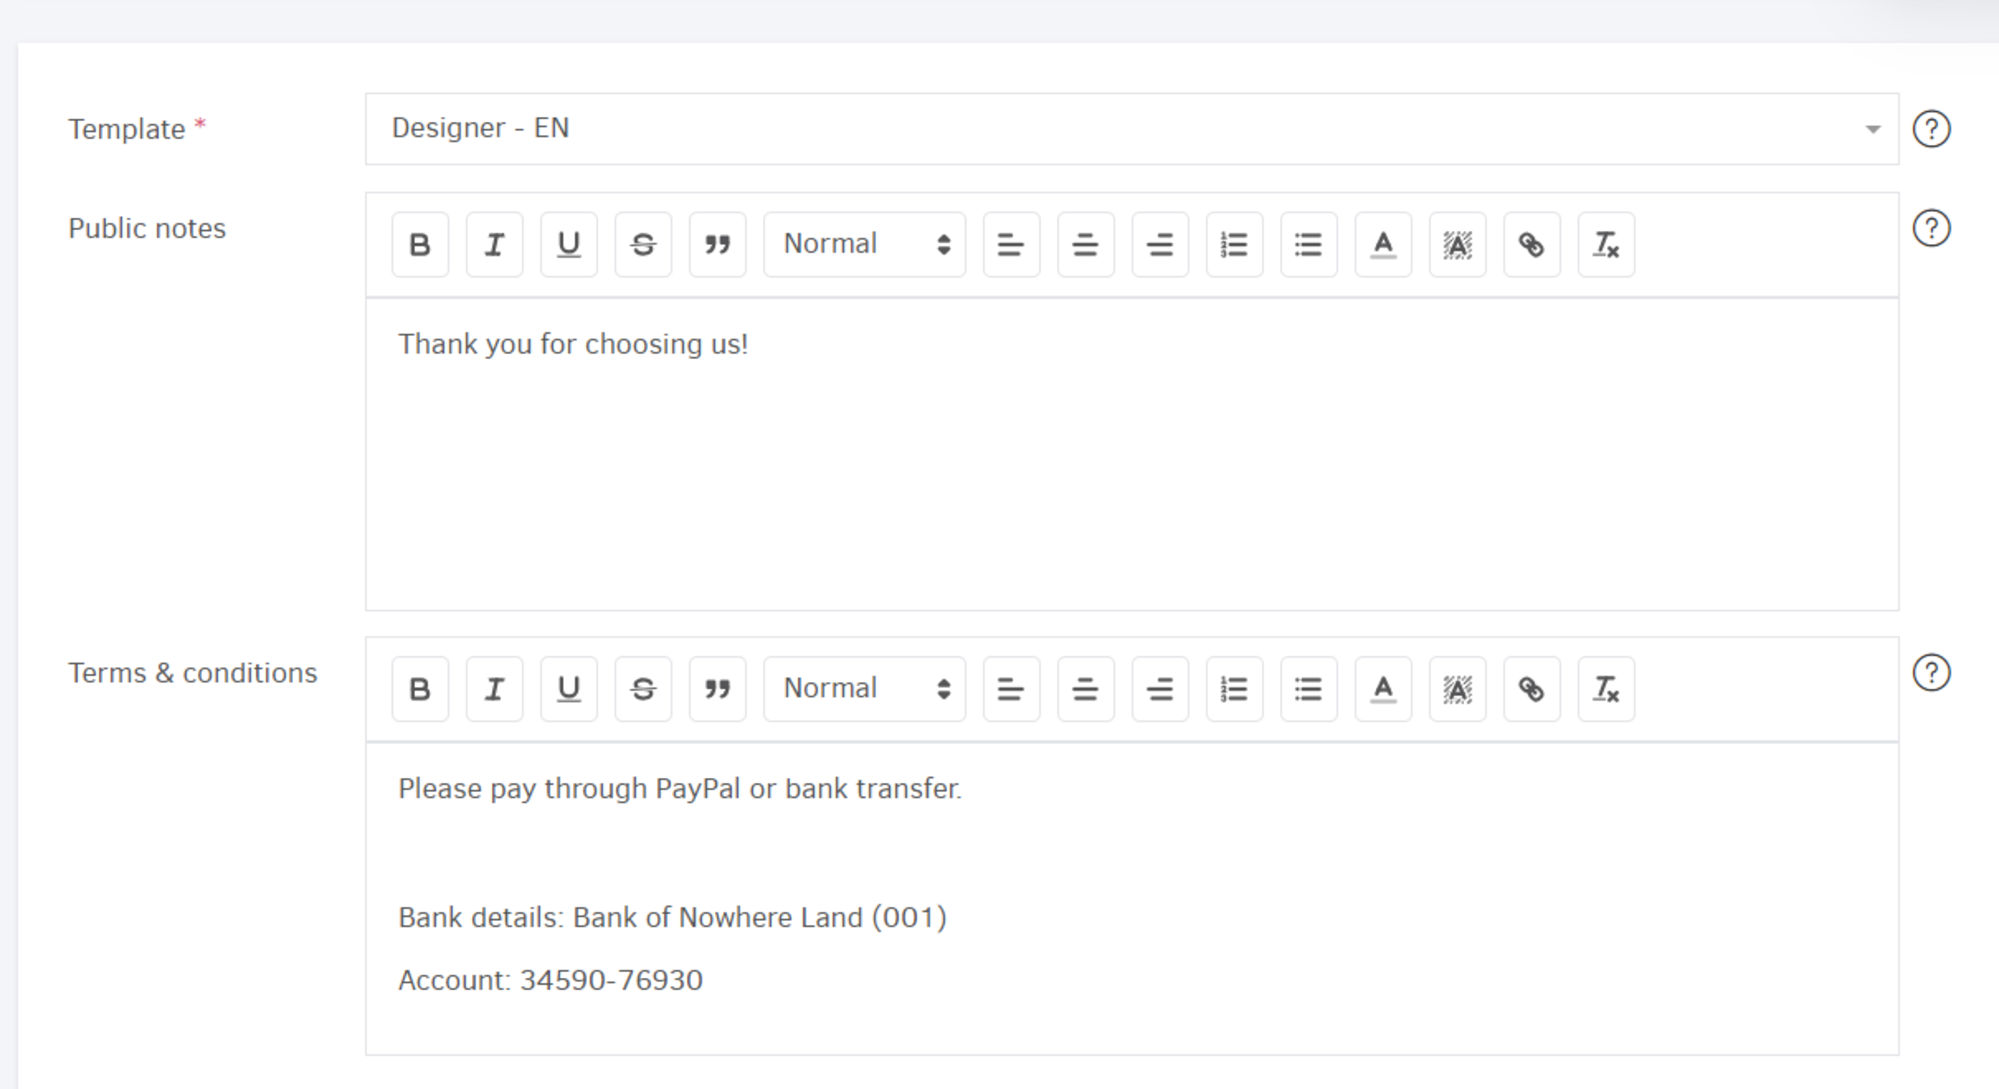
Public Notes may contain further details for your client, such as details on a product delivery.
The Terms & conditions field is used in a similar way, where you may add more information, such as payment details, deadlines etc.
Tracking categories
This feature allows you to record information that will later be used in your reports. First, you should create a tracking category that tracks Sales, along with some options, and then apply the appropriate one as shown below.

In the image above, Salesperson is the title of the category and their names form the available options. By clicking +Add New, you can create a new option, on the spot.
- You may assign a tracking category from invoice view page, as well (after saving).
- You may tag an invoice with more than one tracking categories.
Save Invoice (Draft/Issued)
After you finish editing the document, you can choose to save it either as Draft or as Issued.
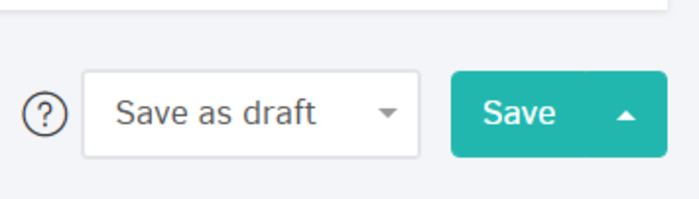
A Draft invoice can be edited or deleted any time - it is considered work in progress until issued (though, it cannot be associated with payments received and will not appear in reports and in client statements). You may save as issued after editing or in overview.
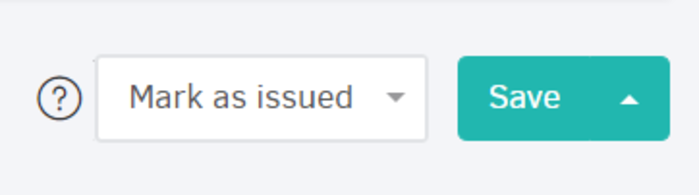
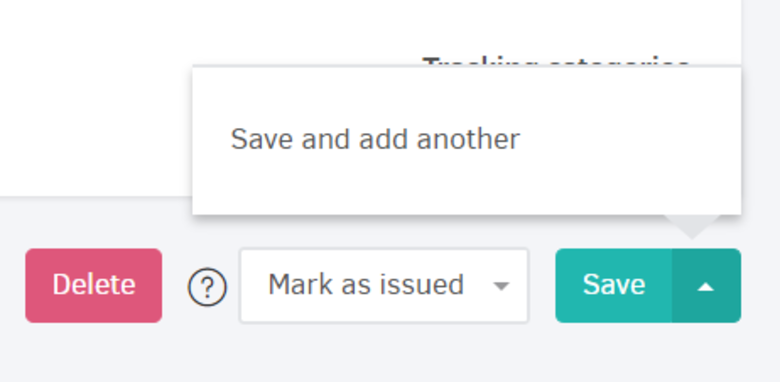
If you are ready to issue the document, you can choose Mark as issued and click Save.
You can also click the Save and add another option, so the invoice is saved, while a new invoice add form immediately opens for you.
The option is available for both draft and issued invoices.
- The add invoice functionality is accessible from various features - you can initiate it, as a shortcut, from your contact's view page, from an estimate you wish to invoice and any page in elorus by clicking the "Add" button on the top of your screen.
- An invoice can also be a product of your work, organized in projects and tasks. To see how you can do that, check this out
Other invoice statuses
Paid/Partially paid
When you add a payment to the invoice, then the status changes to Paid or Partially paid, depending on the amount you enter.
For more details on invoice payment you can check our guide.
Unpaid
Unpaid invoices are the ones for which you have not set a due date, nor have you associated any payment received (Issued, Partially Paid, Overdue invoices).
Overdue
In case you have set a due date on the invoice and this date has passed without the invoice being fully paid, then its status changes to Overdue.
Void
All the invoices that you have canceled are available only in the Invoices menu in Void status.