Tasks are a valuable tool for keeping track of your work in projects. Depending on your business objective, tasks can be one or more actions you take in order to create your service. In Elorus, those are monitored with regards to projects - each project may consist of specific tasks and even be invoiced according to their hourly rates.
You can add those tasks from the get go, as preparation for your work later as well as add them as you go. There are plenty of shortcuts in project and time tracking menus that will allow you to create new tasks on the spot. Archive tasks no longer in use to keep your lists in order.
- For project-specific tasks, you may read the "add projects".
Add from 'task' menu
To create tasks select ...More -> Tasks-> Add.
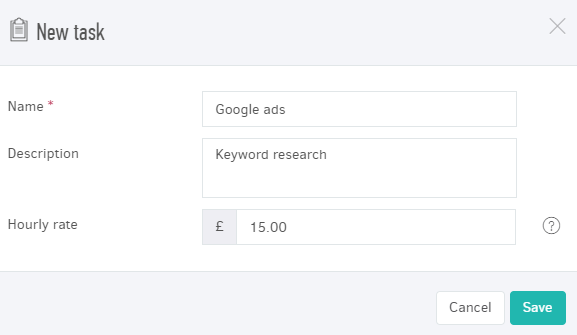
Your task needs to have a Name and the rest of the fields are optional:
-
Description: You can put a short text to describe the task
-
Hourly rate: Rate of the task's billable hour. Applicable for projects whose billing method is set to 'task hourly rate'. If your project's hourly rate is the same as the task's, you don't need to fill it in here. If your task's rate is different, you can designate it here.

Once you click Save, your task is ready to use.
Add using a shortcut
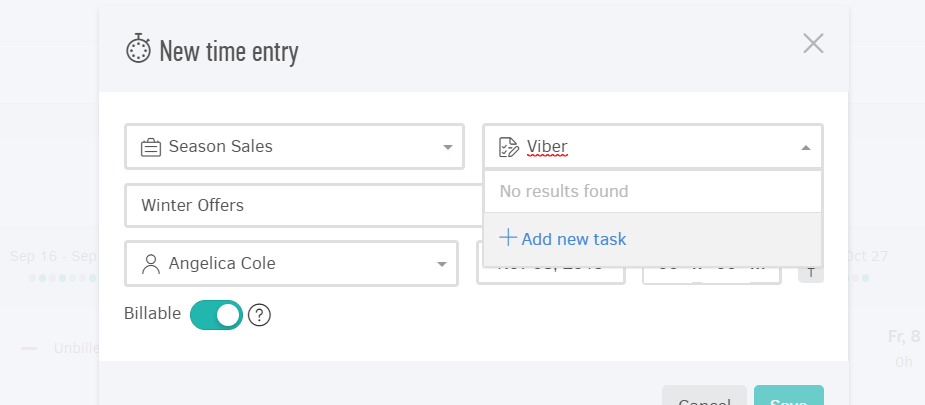
Sometimes the need for a new task comes up when you are busy with, for example, logging time on a new project, a specific task for which has not been created. You can click the "+Add task" shortcut, both for a manual time entry or for time tracked live, as shown below:

This will prompt a sheet similar to the one described above. The moment you finish with adding, the task you just created will appear as a choice for the time entry you are preparing.
Edit tasks
It is possible to edit name, description and hourly rate of a task - the change will not affect previously issued invoices.

You can also click the button if you wish to archive the particular task. The action is available in bulk (see below paragraph).
Archive tasks
Use the option to disable tasks no longer in use. The option will prevent them from appearing on the task list selection upon time entry creation, as well as separate them from the list of active ones.

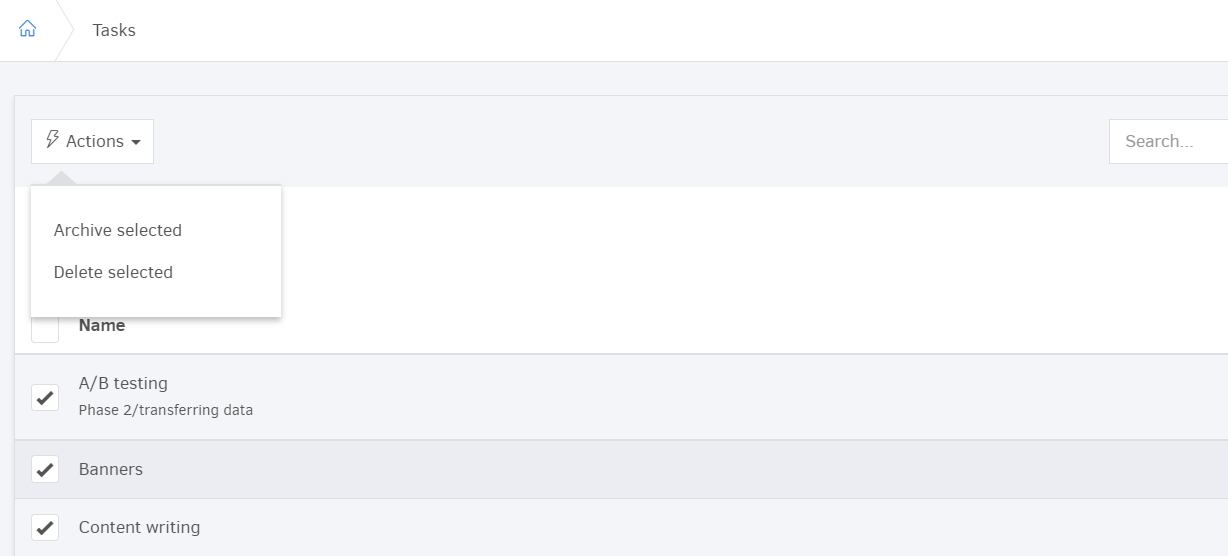
To proceed select the desired task entries and click on "Actions-> Archive selected". The image above showcases the action.
Deleting tasks
From the tasks list, you may select the ones you wish to delete. Click "Actions -> Delete selected". The above image may be useful.
You may delete an individual task by using the 'red bin' icon. See below;

Note: You cannot delete tasks that have been associated with time entries. Choose the 'archive' option, instead.
