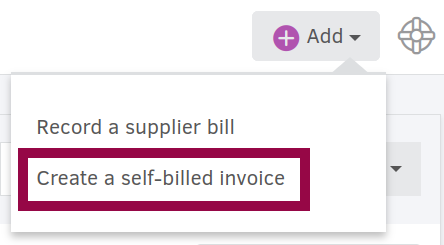
To create a self-billed invoice, navigate to More > Bills, click the Add button and then select Create a self-billed invoice.
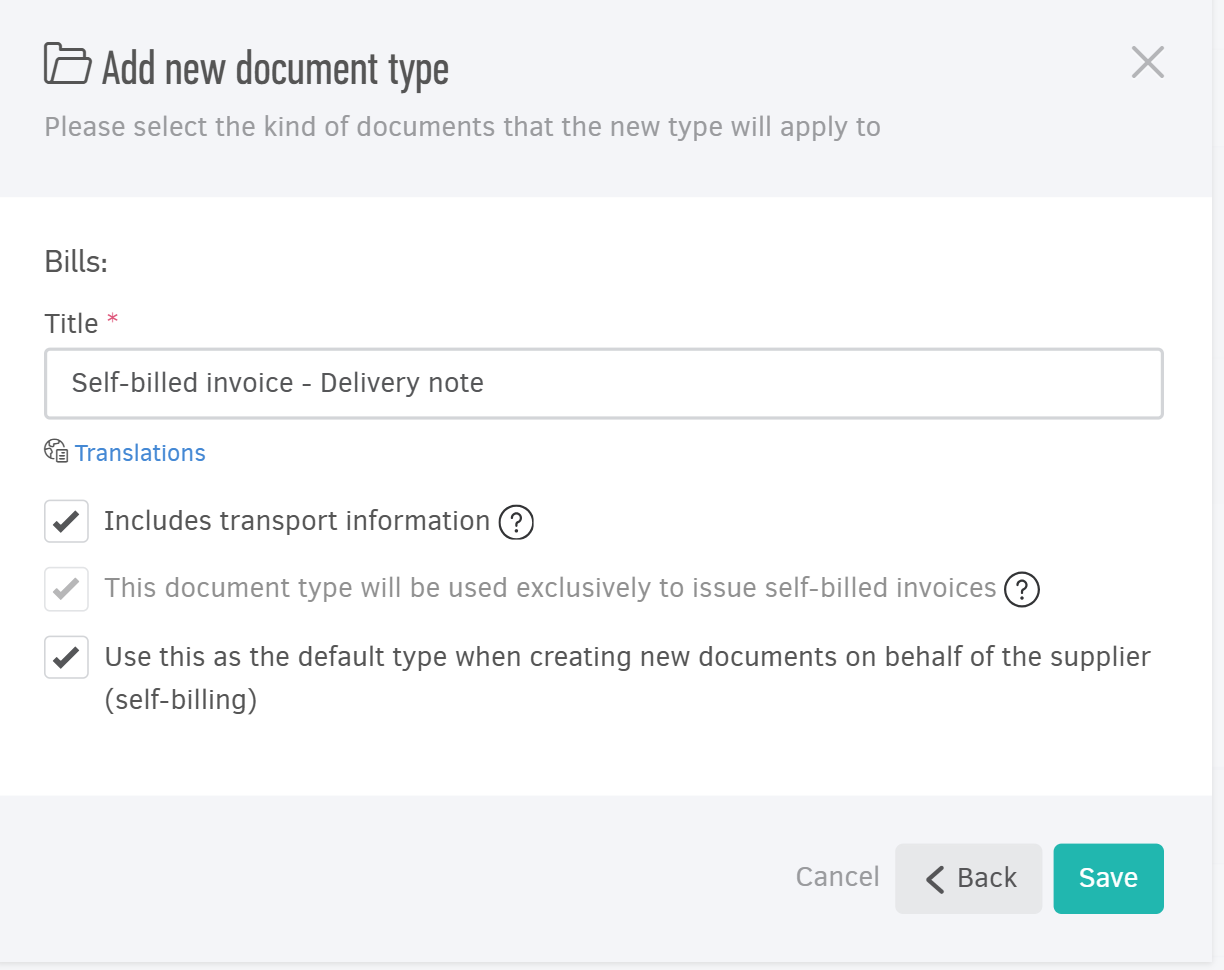
If there are no document types associated with Bills, the option to create self-billed invoices will be entirely missing. Make sure you visit Settings > Document types first and create the document type you want to work with (e.g. "Self-billed invoice").
Self-billed invoices can also serve as delivery notes, allowing you to record and display essential dispatch information directly on your invoice. To create the related document type, navigate to Settings > Document types > Add > Bills and select the options.
Supplier
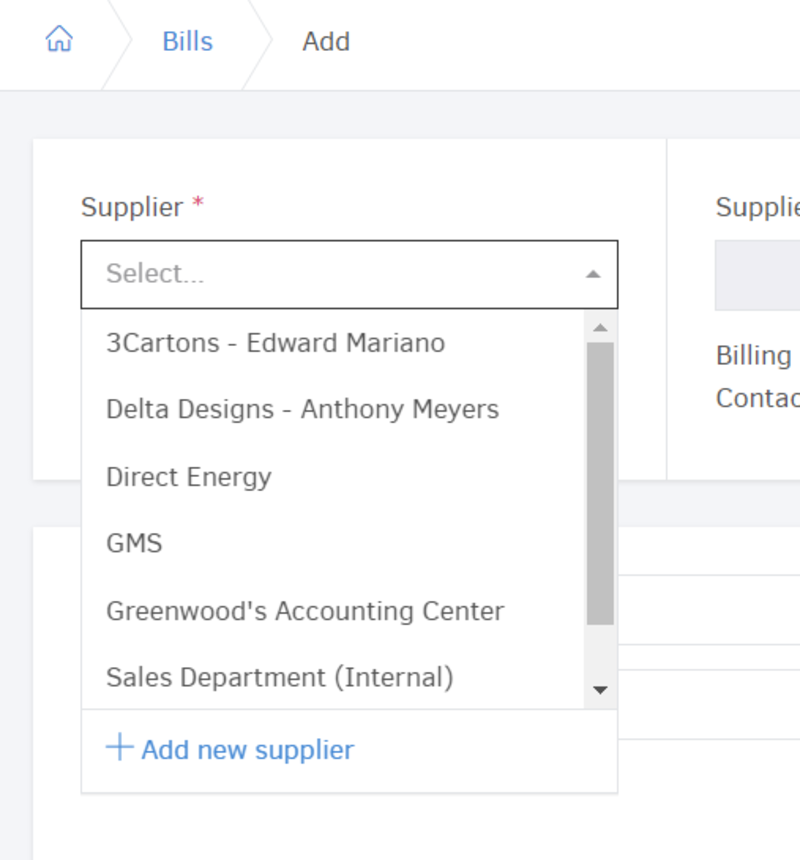
You first need to select the Supplier. Use the search field to find the contact you're looking for or create a new one by clicking "+Add new supplier", without ever leaving the page.
Once a supplier has been selected, Elorus will copy the contact information (i.e. Name, Postal address etc.) onto the invoice. Use the Edit button to modify the information that will appear on the PDF.

Basic information
Choose the Document type and specify the issue Date.

Depending on the numbering settings, Elorus will automatically assign a number to the self-billed invoice. If you wish to set the number manually, click the padlock icon next to the Number field, as shown on the image above.
You may optionally set a Due date by which the invoice must be paid. The Due date will be printed on the invoice PDF. If the invoice is past due, Elorus will update the Bill status to Overdue and will also send you a Notification.
Currency & amount calculations

The application will attempt to automatically resolve the Bill currency, considering (in order of priority):
- The Supplier default currency
- The Organization currency
To issue the self-billed invoice in a different currency, click the pencil icon (see the image above) and select a Currency from the list. In the case of selecting a foreign currency, Elorus will also suggest the Exchange rate based on the specified Date. Of course, you may update the Exchange rate yourself, again via the pencil icon.
The application supports Tax exclusive, as well as Tax inclusive calculations. Use the Amounts are... select box (top-right of the Line items table) to switch between the available calculation modes. If you specify the net amount of products/services and you want Elorus to calculate the total value, choose Tax exclusive. If you wish to set the unit total and have Elorus deduct taxes to calculate net amounts, choose Tax inclusive.
For more information and examples on how amount calculations work in Elorus, please see the related article.
Self-billed invoice lines

In the next section you must specify the included products or services, along with their prices. To add an new line use the Add line button. To remove an existing line click the X icon to the right side of the line.
Line item fields
Each line includes the following fields:
- Expense category that the line belongs to (e.g. operational expenses, office supplier etc.).
- Description, as it will appear on the invoice PDF.
- Quantity and the corresponding Unit of measurement.
- Unit value or Unit total, depending on the selected calculations mode.
- Discount. You may optionally apply a discount on the initial unit value. The discount can be either a percentage or a fixed amount.
- Net value. The application will always calculate the line's total net value automatically.
- Line taxes. GST / VAT or other applicable line Taxes. You can disable auto calculations and specify the tax amounts manually by clicking Edit tax amounts. When you do so a triangle sign appears. Note that you can set up to 2 decimal places in the relevant field.
- Product/Service. To denote that this purchase should be associated with an inventory item, select a Product/Service from the list. The line description, the amounts, as well as the line taxes, will all be filled in automatically once a Product/Service has been selected. If the product stock is activated, Elorus will also update (increase) the stock based on the purchased quantity.
- Project. Optionally, associate this line with a Project to gain access to useful insights about the Project finances. If the selected project is billable, you are also presented with the option to bill your client with the expense, the next time you invoice the Project (see the image below).

Contact taxes have a higher priority than Product / Service taxes. Therefore, if both the Supplier and the selected Product / Service specify a set of default taxes, Elorus will only use the Supplier taxes on the corresponding line.
Global taxes
As with sales invoices, in this field you can apply taxes on the total net value of all lines of the document - as long as it is the same for all lines, instead of setting it per line. You can override automatic tax calculation and set it manually by unlocking the padlock. You remove it by clicking the "x" icon.
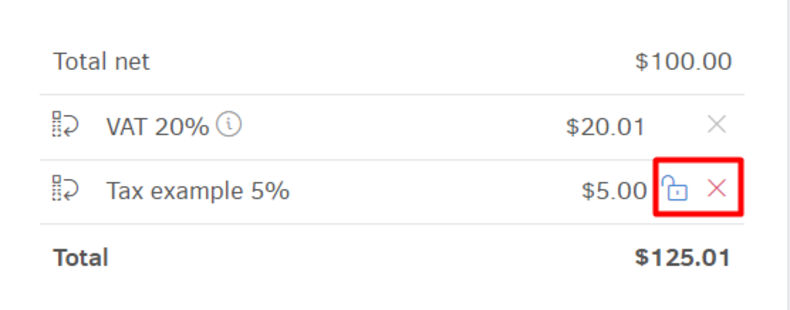
Νote that you can change the display order on the printable for all the applied taxes with "drag & drop".
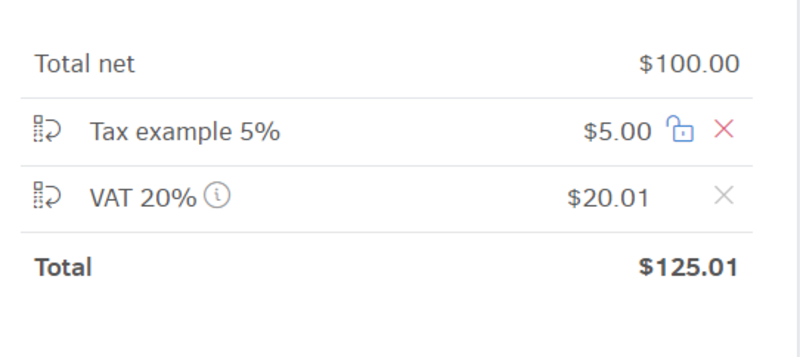
VAT taxes and any other tax subject to VAT must not apply to Global taxes (document level).
Withholding taxes
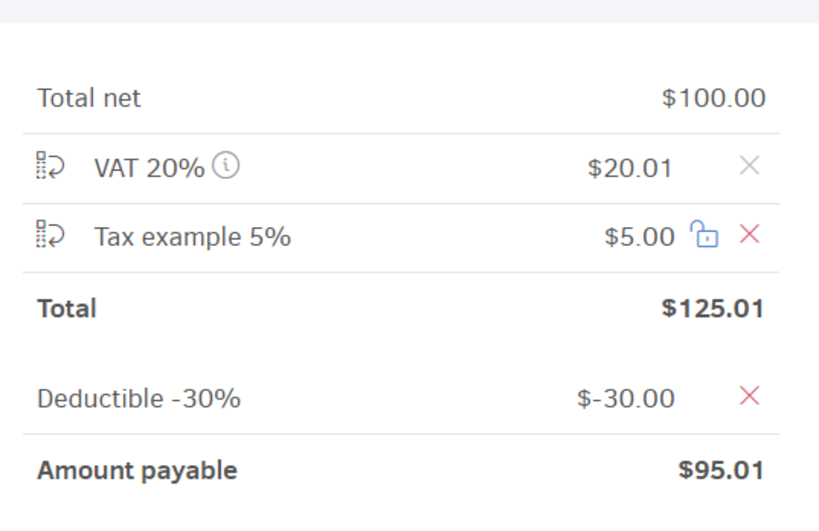
Withholding taxes are a special form of taxes that reduce the amount payable of an invoice, while the total amount remains unaffected. However, withholding taxes are not being used in all countries: if you've never heard this term before, it most probably does not apply to your business and you're free to skip this section!
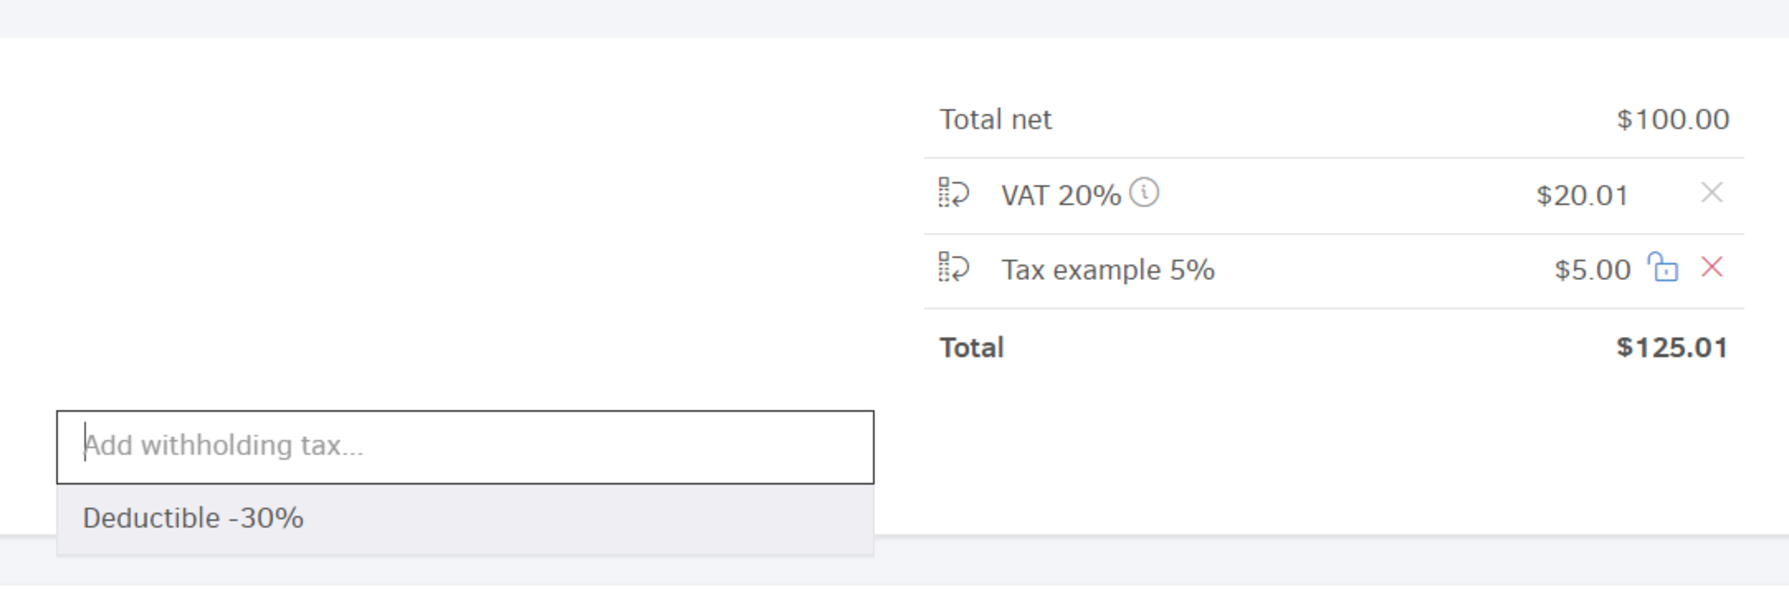
Right below the line items table, you are presented with the option to specify a set of Withholding taxes that will be applied to the invoice, effectively reducing the total amount payable. If there are no Withholding taxes defined in your Tax settings, this section will be entirely missing from the self-billed invoice form.
Appearance settings
Template
The Template defines the appearance (layout, company logo etc.), as well as the language of the printable PDF. Elorus attempts to resolve the most appropriate Template, considering (in order of priority):
- The Supplier's invoicing Template
- The Organization's default Template
Public notes
Public notes is a free-text field, the contents of which will be printed on the resulting PDF. If the selected Template contains default notes, they will be automatically copied over to this field and you are free to make adjustments prior to saving the invoice.

Tracking categories
Once you set up custom Tracking categories to monitor Bills based on your business needs (e.g. expenses by work group), you can associate this self-billed invoice with the appropriate option of each Tracking category.
![]()
Save your work
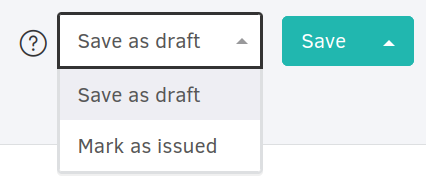
Save as draft or Mark as Issued
When you're done editing, choose whether you want to save your work as a Draft (to denote that this is still a work in progress) or mark the invoice as Issued (the invoice has been finalized).
More save options
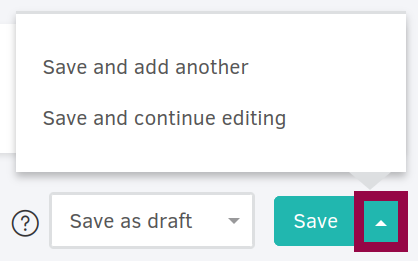
- Click Save to save your work and exit.
- To continue adding bills right away, select Save and add another.
- To apply your changes and stay on this page to continue editing the Bill, click Save and continue editing.
