
At any given moment you can start logging times (per project, per user etc.) from the “Time” menu.
Registering time entries can be done in two ways:
-
Manually, by clicking on "Log time".
-
Automatically (live) from the timer found at the top of your page
Users with the role of time tracking manager can create time records for other users and view time records for all users. For more information visit the related article.
Log time manually
From the main menu, go to "Time". By clicking on Log time you can create an individual time entry.
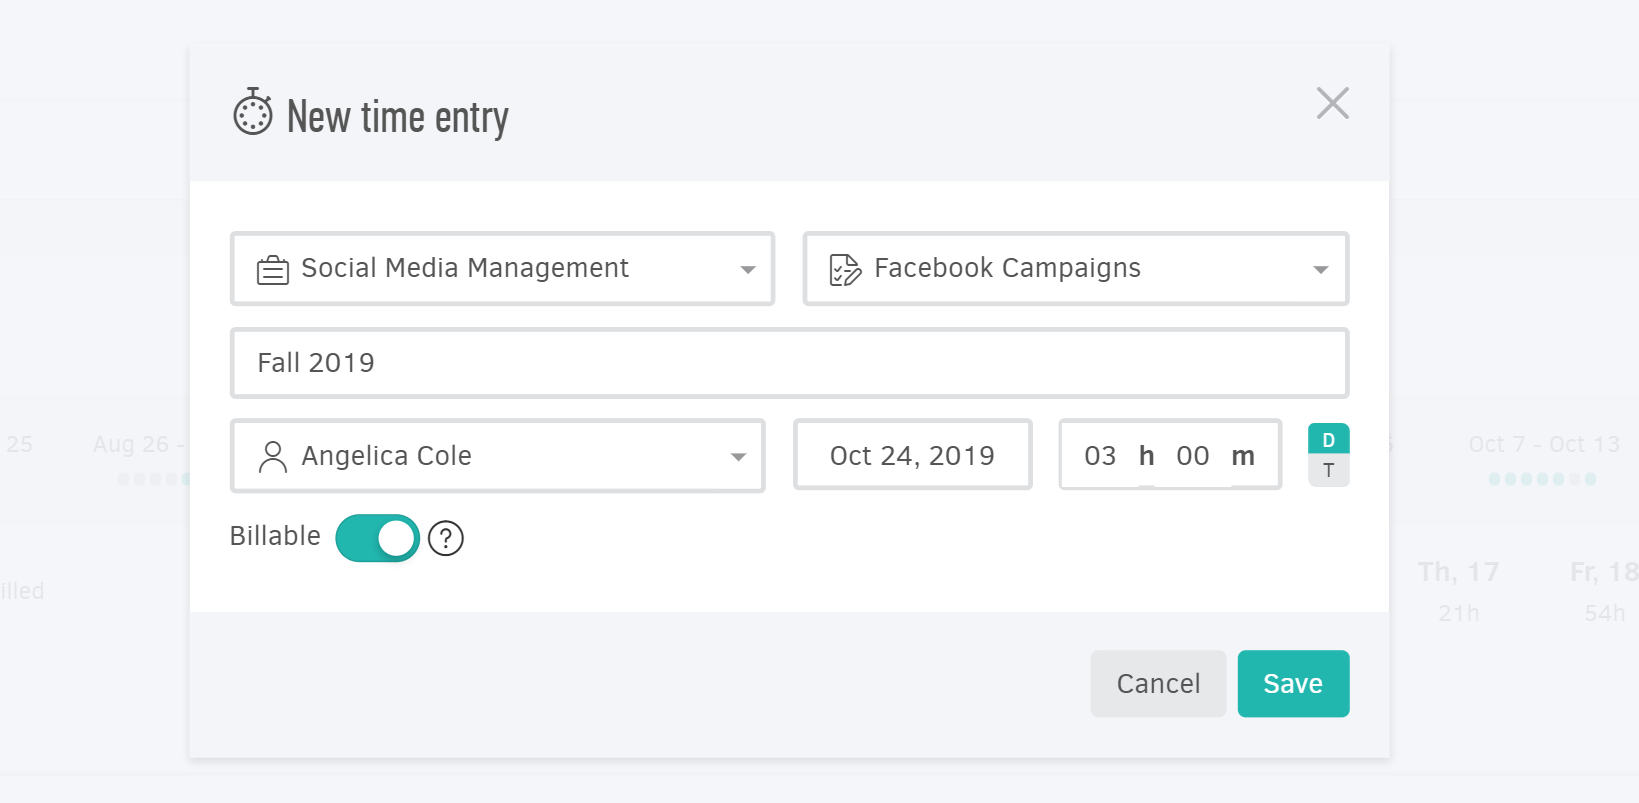
To proceed you need to select:
-
Project by searching the desired one in the related field or adding a new one.
-
Task, which can be selected by searching or adding a new one on the spot.
Both project and task are mandatory for the creation of the time entry. In order for it to be billable, the project will also need to be a billable one.
You can also:
-
add a description underneath (in this case Fall 2019),
-
enable the "Billable" button (so you can bill the time entry to your client later on) and set a date and time of this entry.
-
If you are a 'time tracking manager', you can enter time for a different team member as well. Proceed by selecting their user name on the drop-down list (by clicking the related field).
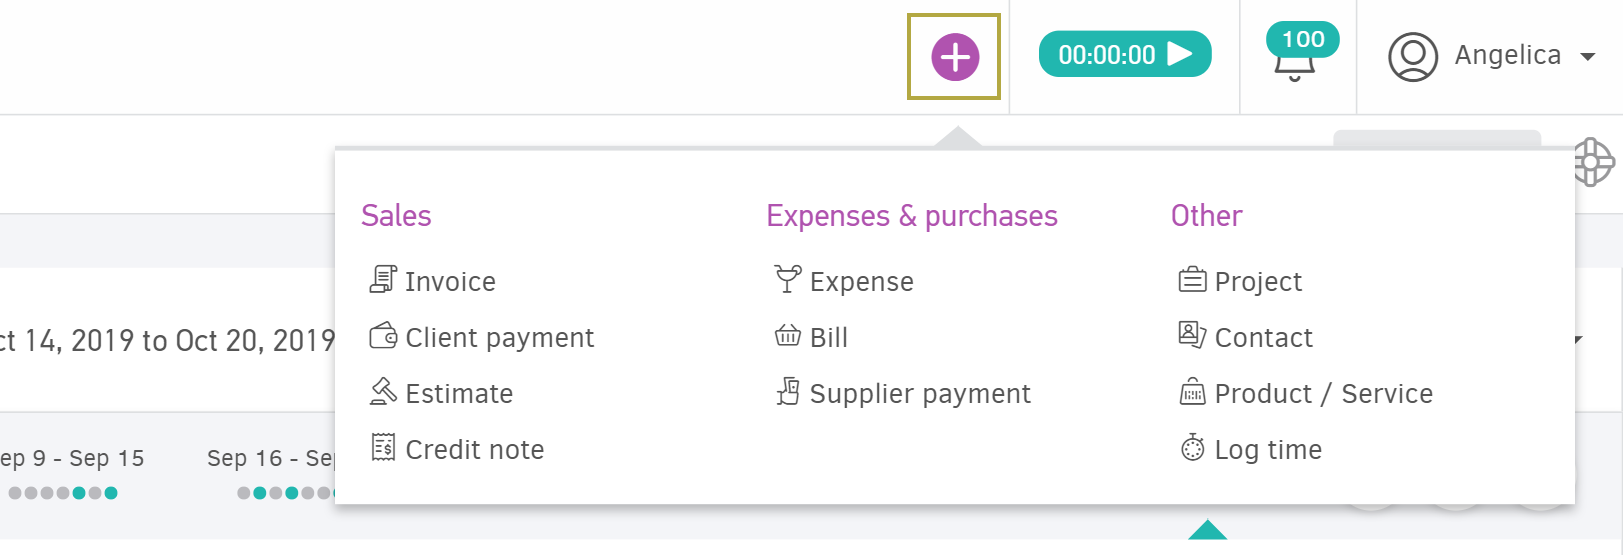
You can also enter time manually by using the Quick Add menu on the top-right of your Εlorus account.
Finally, you can manually log time through each project's preview page:
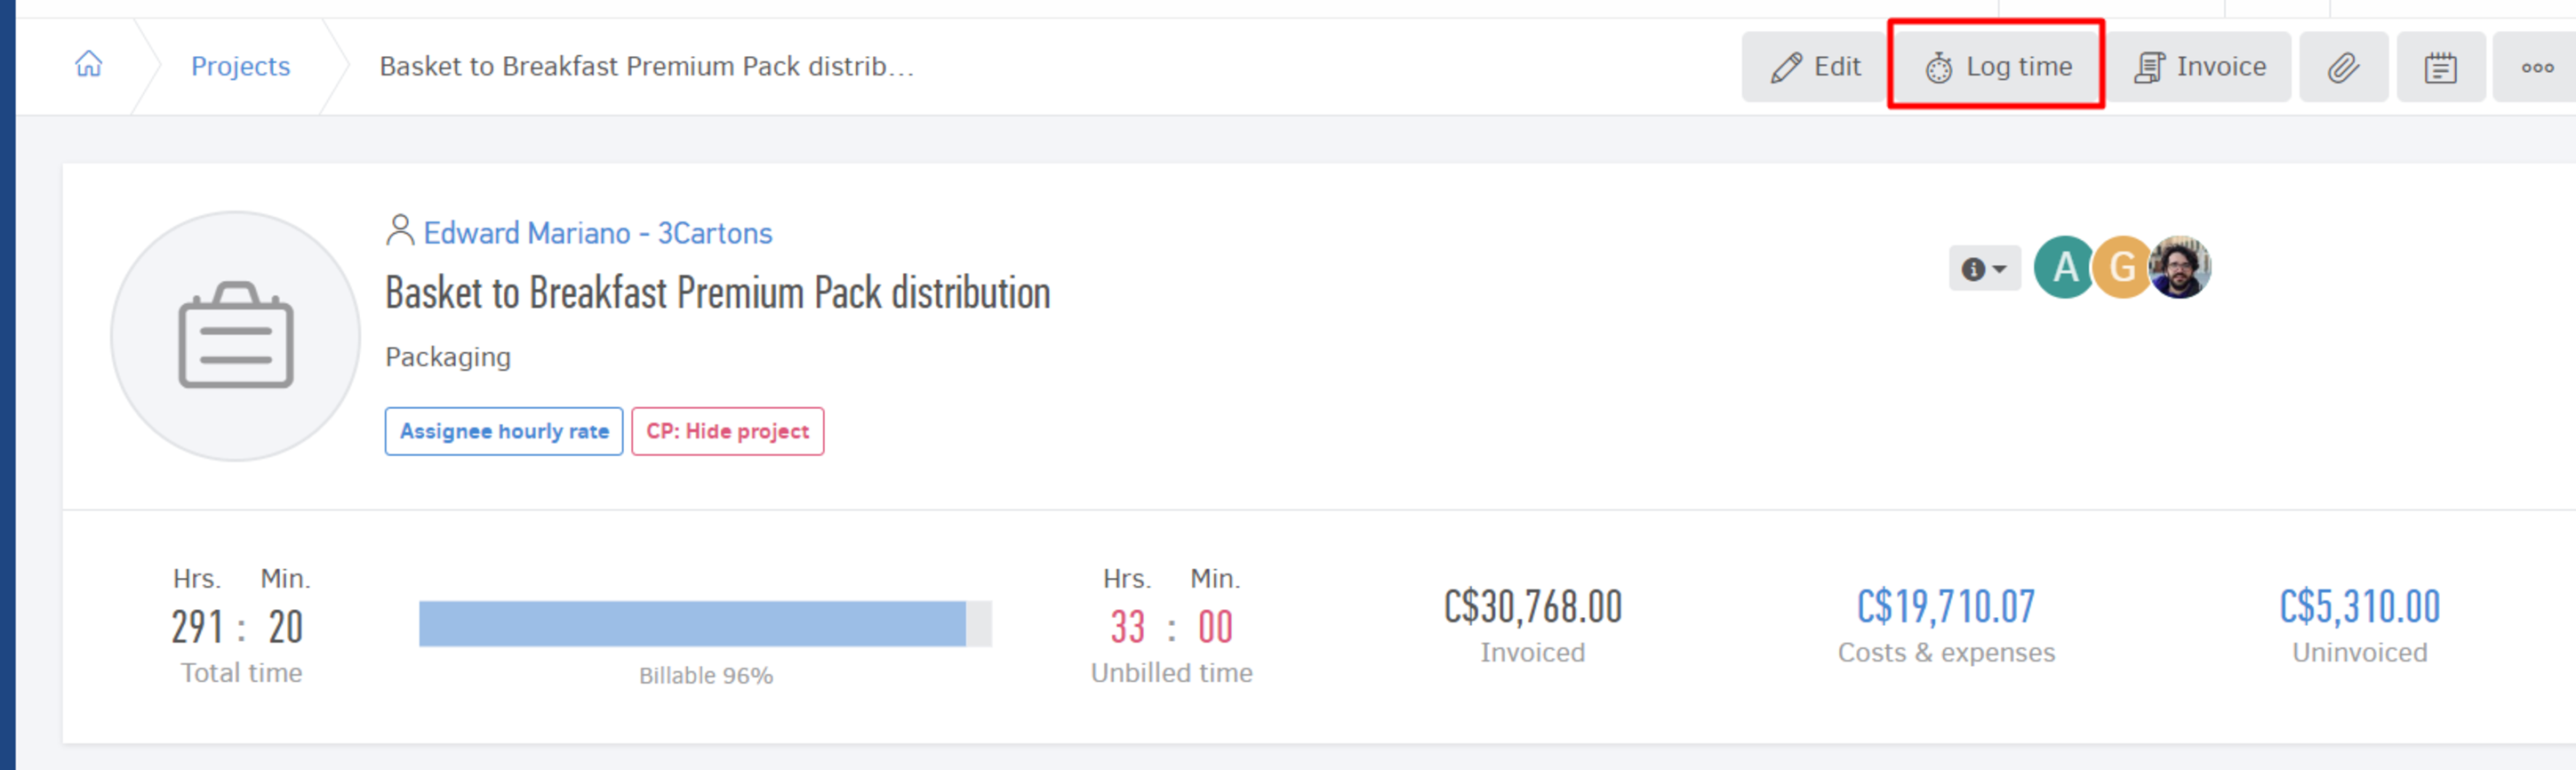
By clicking the Log time button inside a project, the manual time entry window will open, with the project field pre-filled.
Record your time (live)
If you wish to track your time while you are working on a project or individual task, elorus comes with a few different options, from elorus's interface as long as any of the available integrations.
Use the timer (ongoing projects)
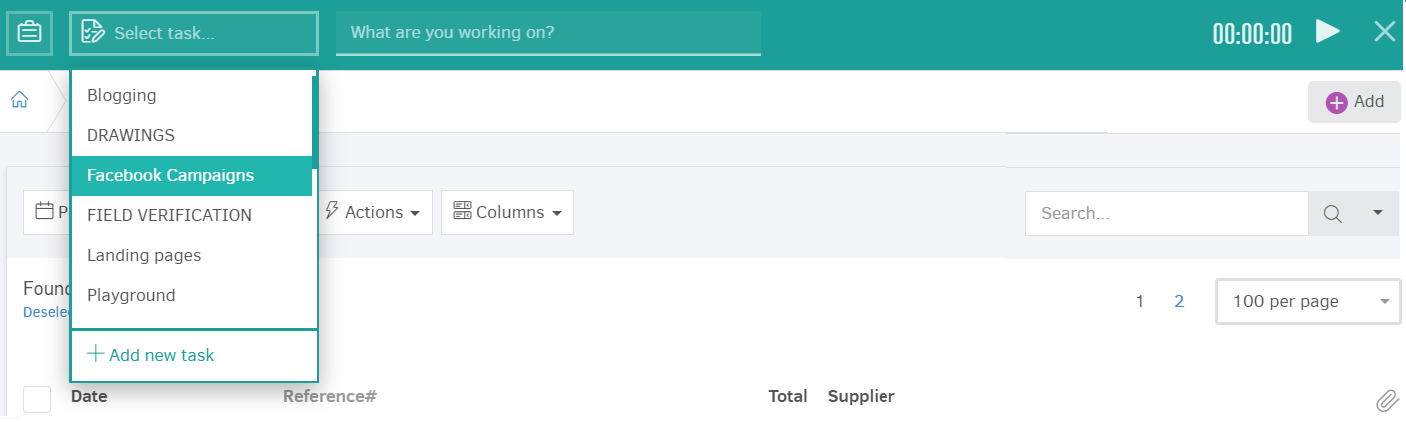
Say that you logged in elorus and you wish to be recording the time spent on a project/task. You can utilize the timer available on the top of your elorus screen from any page in elorus.

Click on the timer field (image above) and the recording time bar will appear on the top of your screen.
The timer will start the moment you select a task or project or if you click on the 'play' button.
You can let the time roll and add more details in the time entry fields as you go. You could also add some further detail later on by editing the time slip.

Clicking on X, the bar folds back at the top of the screen so it doesn't take up your screen's space.
Once you have finished working, you can tap the Stop icon and Elorus will create a new time entry that can be found in the time entries list.

When you finish your task, you can press the Stop button and a time entry will be created automatically.
Note: Even though project and task selection are mandatory, you can create a live recording of time spent in order to save you time.
Time tracking integrations
Besides being able to track time while working in elorus, you can also do so by using the available integrations. You can start/stop recording time from any webpage if you are using Google Chrome or Mozilla Firefox, as there are available integrations through extensions/add ons.
Also, available integrations you will find for the following platforms: Asana, JIRA, Trello. This will allow you to register your time spent on projects live, while you are working on them without living the platform.
Conclusion
Time entries, no matter how they have been created, appear on both of the 'lists' and timesheets of the "Time" function.
Don't forget that you can always create new time entries, add more time, even delete entries by utilizing the different actions available to you through the views shown.