

A bill in Elorus represents an invoice or receipt you've received from a supplier. It can be used to record a pending expense or the purchase of items of your inventory.
When a bill is issued in Elorus, it is considered Unpaid by default. This status enables automated reminders to notify you of outstanding payments so you can take action.
Once payment has been made, you can update the bill status to Paid using one of the following methods.
Mark as Paid/Partially paid
To mark a bill as Paid/Partially paid you need to associate it with one or more payments sent menu or by clicking +Add payment from the bill's overview page.
If the bill is still in Draft status, you must change it to Issued before adding a payment.
You can associate multiple payments (sent) with a single bill. This allows for partial payments or the use of advance payments toward the bill. If the total amount of associated payments is less than the bill’s total, the bill will be marked as Partially paid.
Add payment(s) from Bill overview
At the bottom of an issued bill, click Add payment.

You’ll see up to three options, depending on what’s available:
- Apply credit
- Use the excess amount
- New payment

Apply credit
Appears when you have available supplier credits. You can apply credit either from the bill or directly from the credit note.
Use excess amount
If a supplier payment is already recorded under Payments sent, you can apply it to pay off the bill.
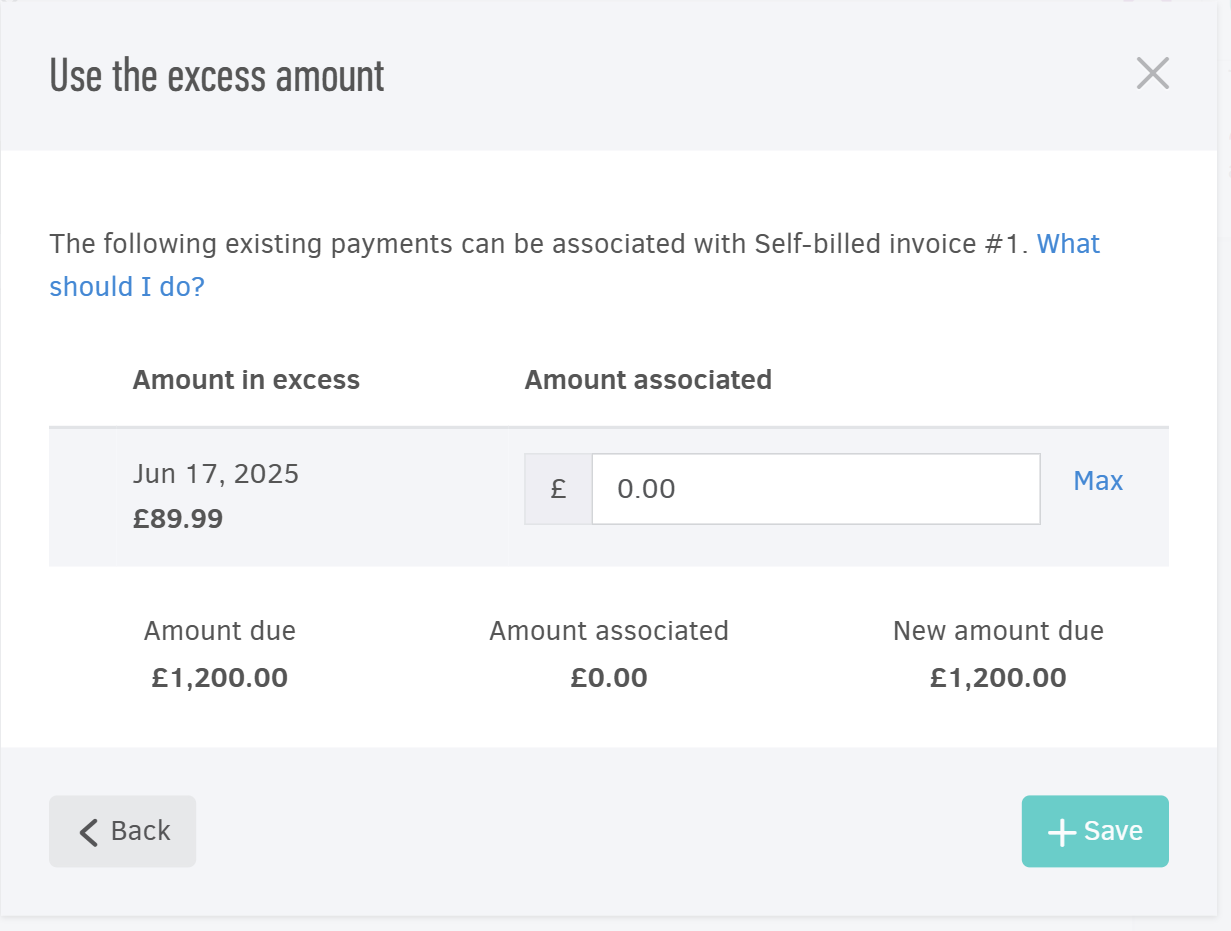
You can also use an excess amount to pay off multiple bills directly from the ... More > Payments sent menu (see below).
New payment
This option creates a new Payment sent record, which is simultaneously linked to the bill. When you click Pay-off, the full amount of the bill will be used to create the payment.

Add/associate payment(s) from "...More > Payments sent"
If you want to pay off multiple bills at once, use the most of the Payments sent section. You can find more information in the related article.
In the example below, the available amount is enough to pay off two bills. Once the Pay-off button is clicked, the corresponding amount is going to be associated with the bill and mark it as Paid.

To automatically settle bills by issue date (from oldest to newest), click Auto pay-off and confirm.
After you’re done, click Save to finalize the changes.
Delete payments
If you plan to edit, delete or void a bill, you first need to make sure that there are no payments associated with it. You can achieve this by one of the following:
Delete payments sent permanently
To permanently remove a payment, go to
...More > Payments sent, select the entry you want to delete, and click Actions > Delete selected.

Unlink payments sent from the bill
If you'd like to keep the payment in the system for future use, simply unlink it from the bill.
On the bill’s view page, under Related payments sent section, click the trash bin icon.
When prompted, confirm by clicking Yes, I'm sure. The action is irreversible.

If you intend to use a removed payment for a newly issued or reissued bill (e.g., after canceling the original), we recommend using the Use excess amount option. This ensures the payment is recorded only once in the system.