
The process of creating records in Elorus is "adding". Each time you issue an invoice, enter bills, upload contacts or increase the items in your inventory, you essentially create new records.
All of these records appear in lists, with different filters that allow you to quickly locate records you wish to modify. You can select one entry, open it and proceed with editing. You can also perform bulk actions.
To explore the functionalities of the lists, let's view the invoices menu. Once you click 'Invoices' from the main menu, you get an image similar to the one below:

Let's explore the available buttons in close-up with the help of the following scenario: Your client needs to receive every unpaid invoice you issued to them for the first week of each month. Here's what you could do.
1) Period
The button is available for Invoices/Recurring Invoices, Credit notes/Supplier credits, Estimates, Expenses/Recurring expenses, Bills/Recurring Bills, Payments sent/received.
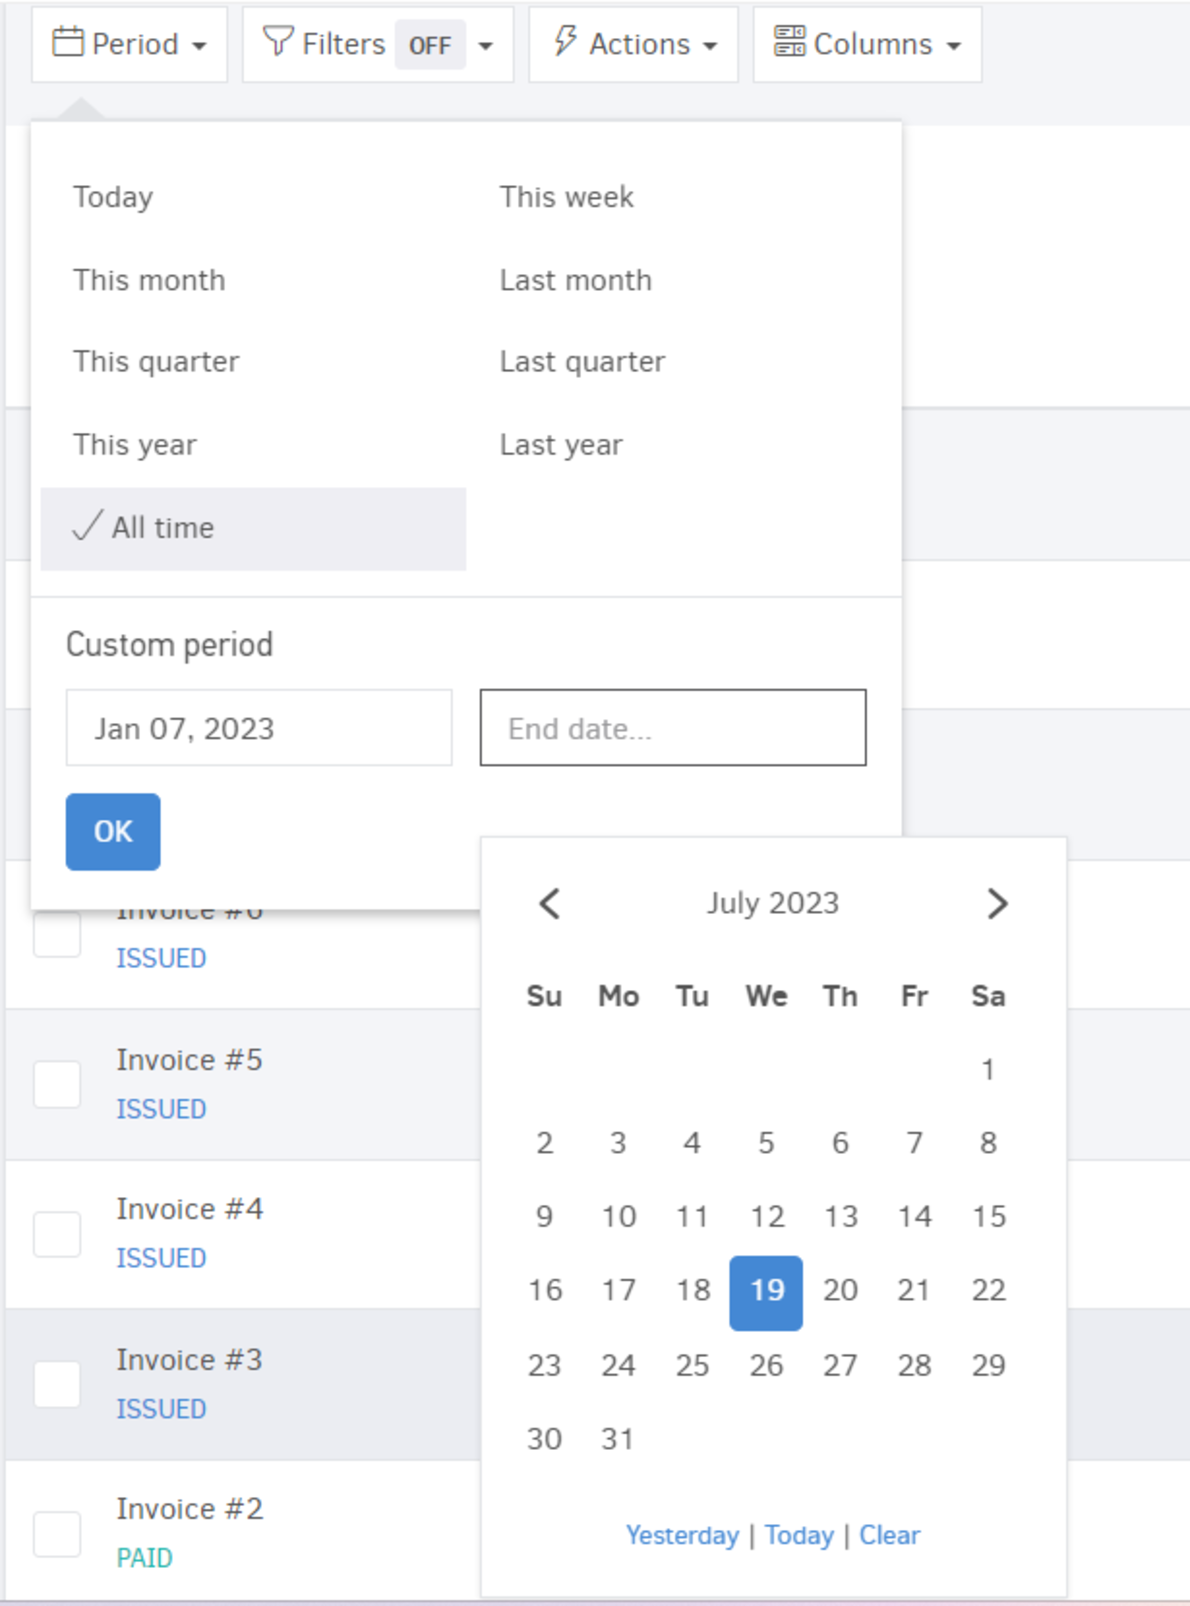
Every invoice comes with a "Date". This is the issuing date (or prospective issuing date when the invoice is still "draft").
From Period you can select which invoices appear on the list.
2) Filters
Filters are available across the application: all of the feature mentioned in the previous section and in addition: Contacts, Projects, Tasks and the Inventory, all provide with relevant filters.
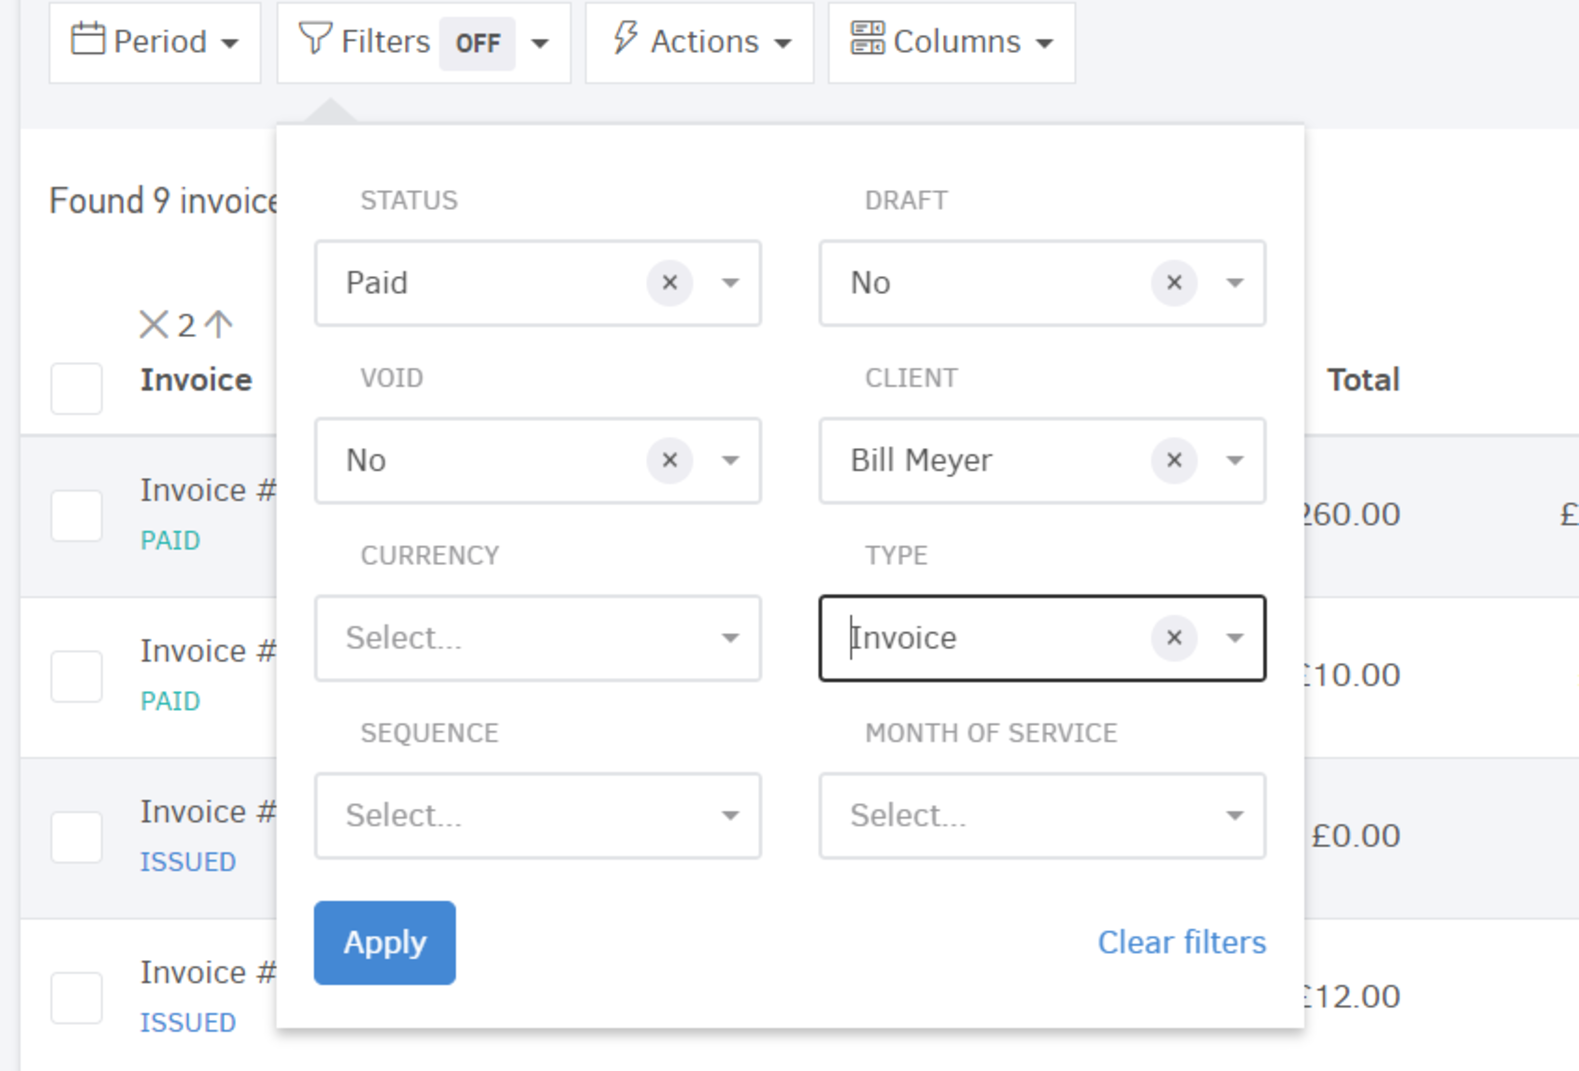
To confine the invoices viewed, you can use filters such as Status (Draft, Issued, Overdue, Paid/Unpaid/Partially paid, Void), Client (contact name), Type, Sequence and more.
Note that, whereas some of the filters are available with your first invoice entry, some of them come-in when the corresponding feature is set-up. This is the case of tracking categories: when one is created, it immediately appears in the filters.
Hit "Apply" and the filters will take place.
3) Actions
The button enables you to massively copy, email, export, even delete records.
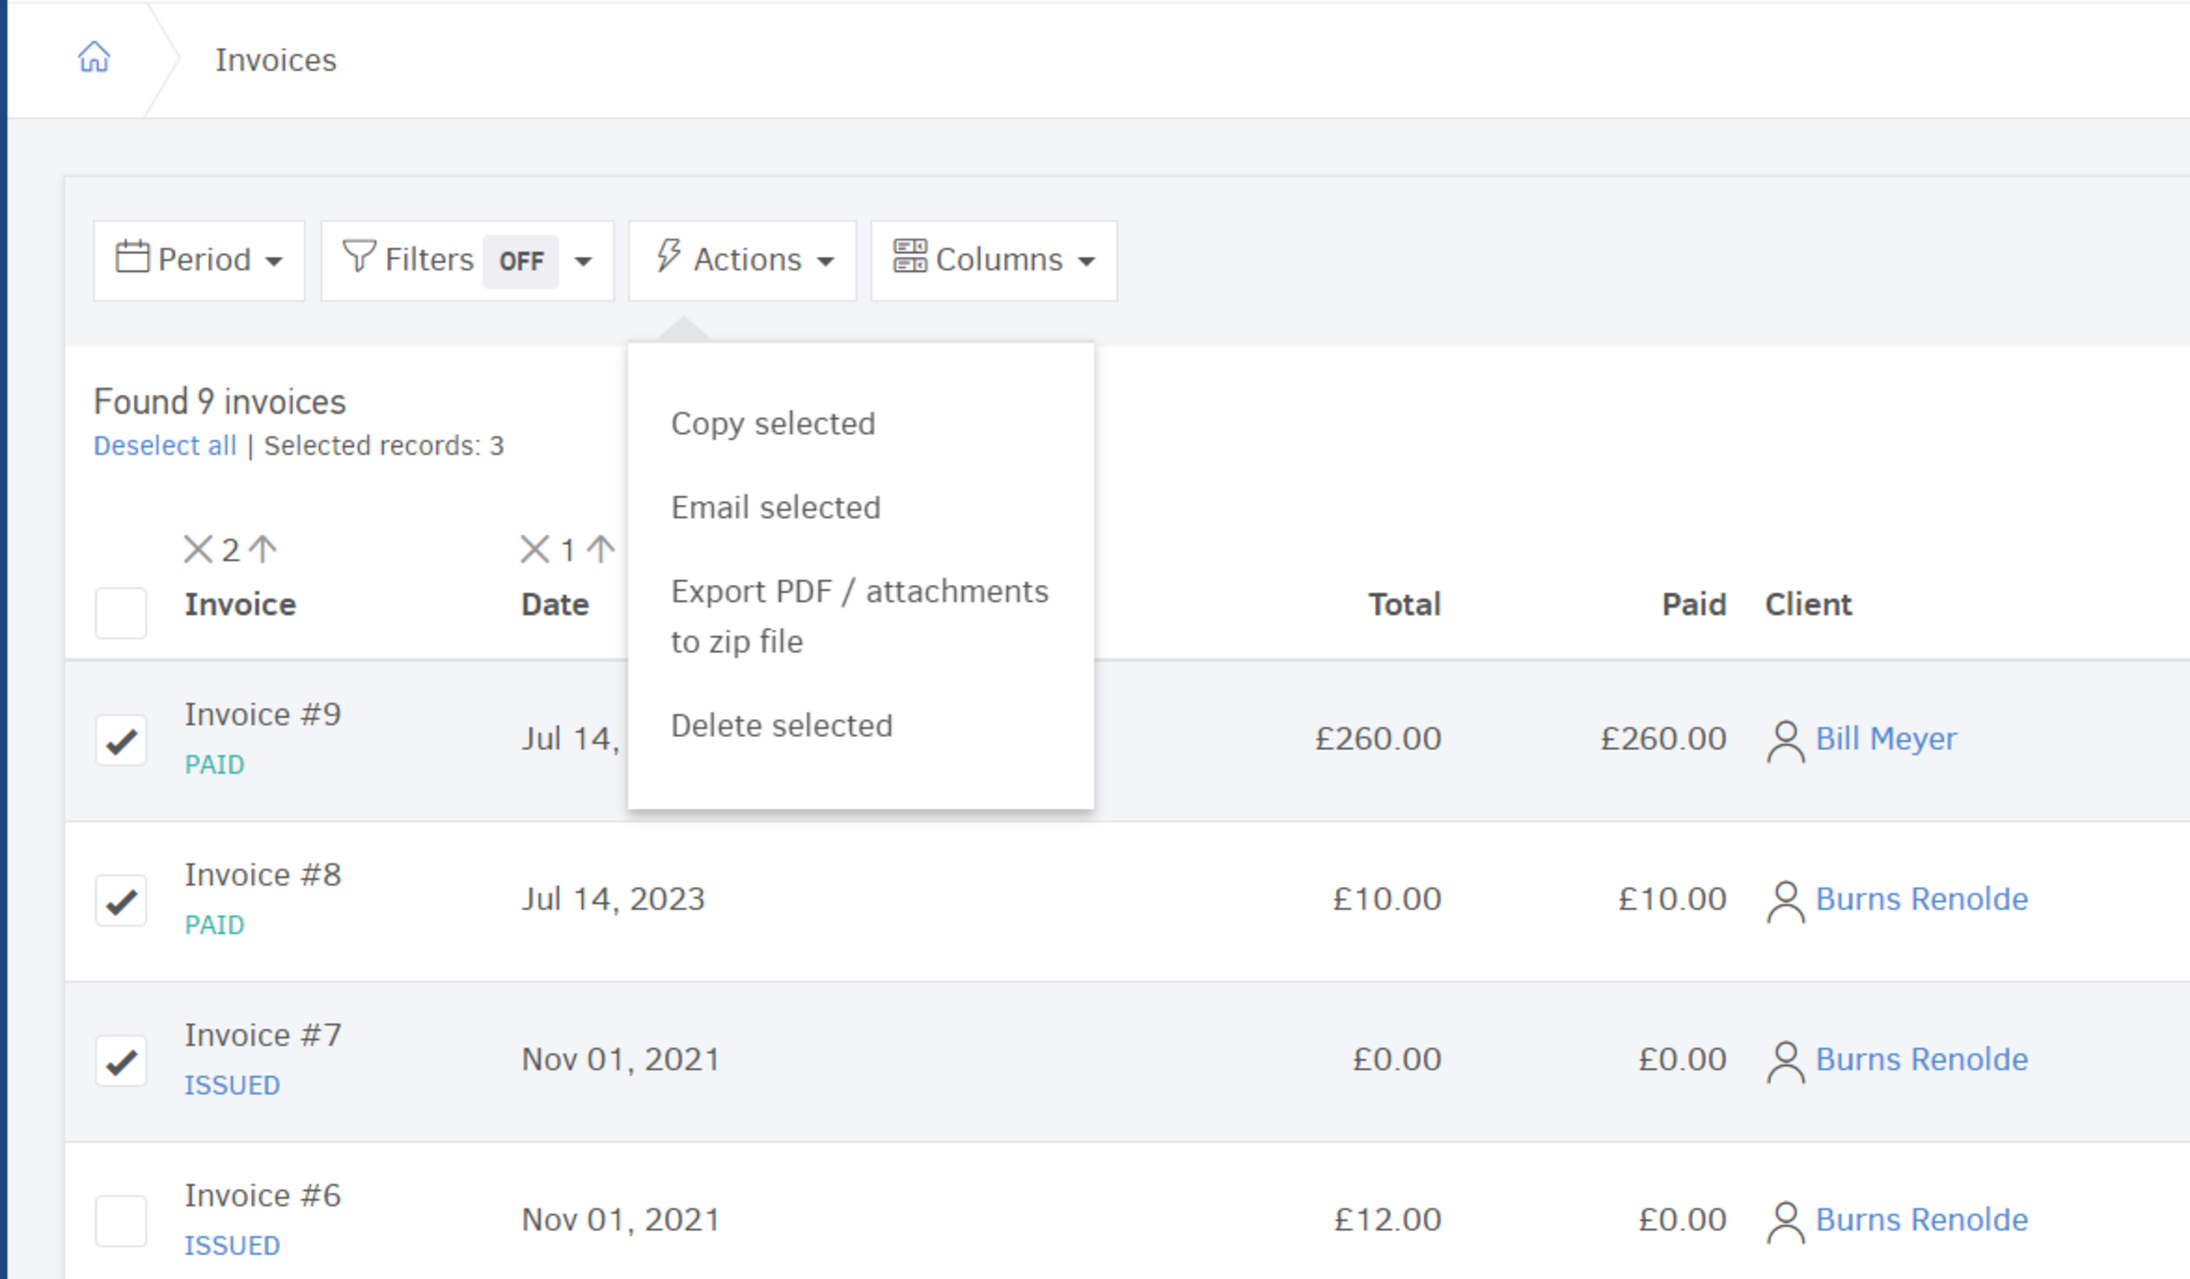
To perform any of these actions, simply check the box on the left of each record and press the button.
4) Columns
This option allows you to set the columns based on the information you wish to view for your records.
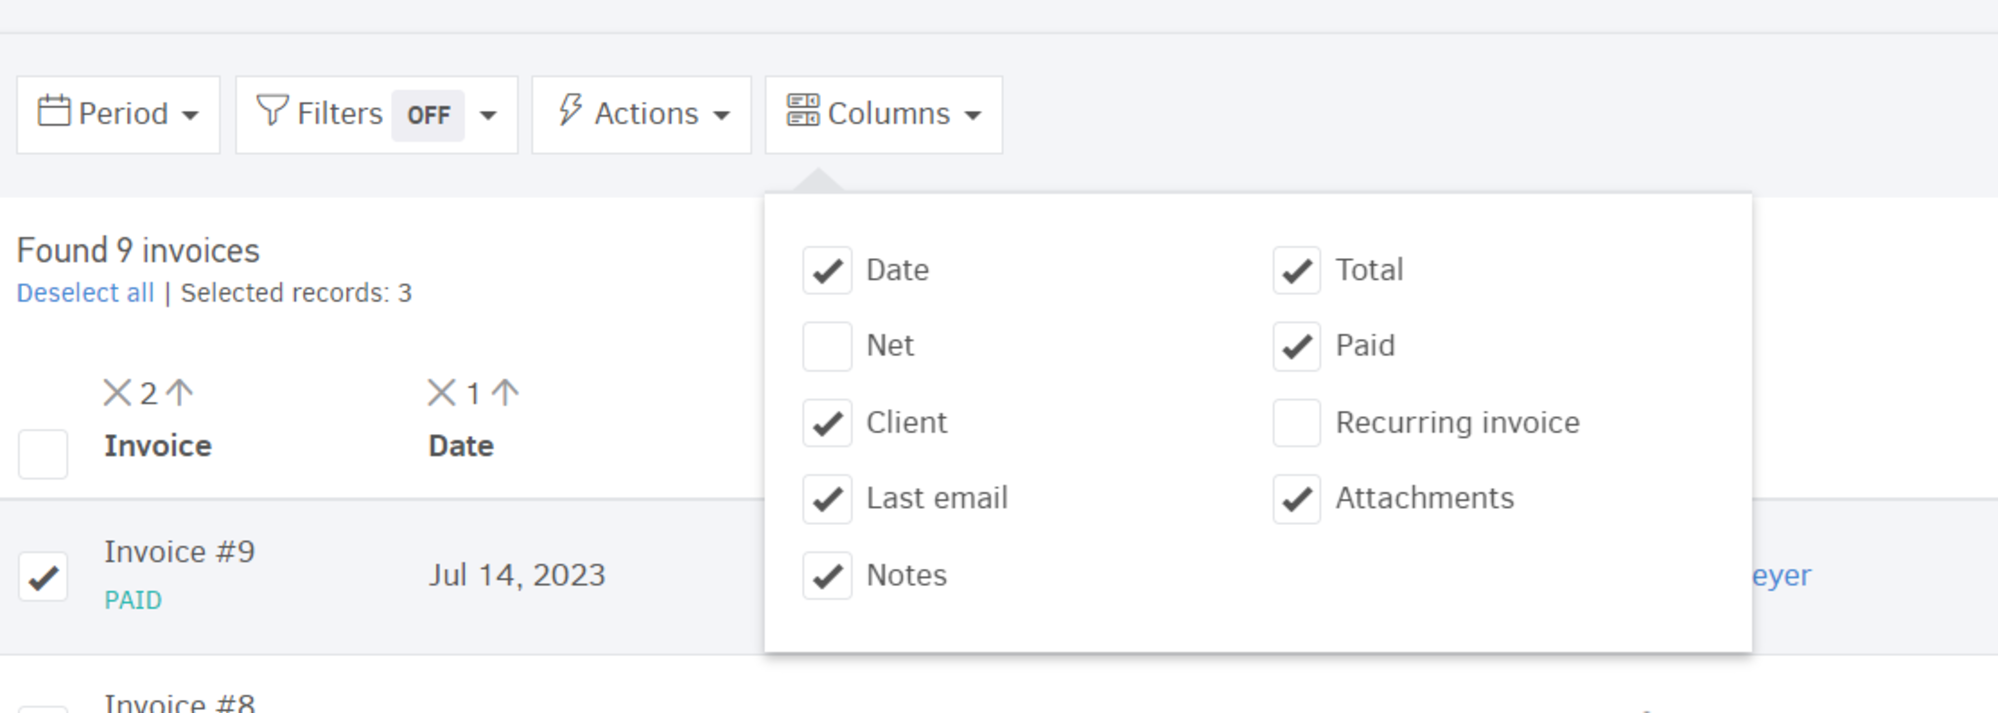
You can add columns corresponding to the amounts, attachments, notes, and of course, the last email sent status.