With Elorus, you can track and invoice the time spent on various tasks for your clients. These invoices can also include related expenses.
You may also use the time tracking feature for internal purposes, to monitor the time required for specific tasks and better assess the cost of your own time, and that of your collaborators!
Add a project
To begin organizing your time entries, create one or more projects, depending on your business needs.
Users with Administrator or Business Manager role, or custom roles with time management permissions, can create projects.
You can find more information about user permissions and roles in the related article.
Users with limited contact access can only view and create projects for contacts they' re permitted to access.
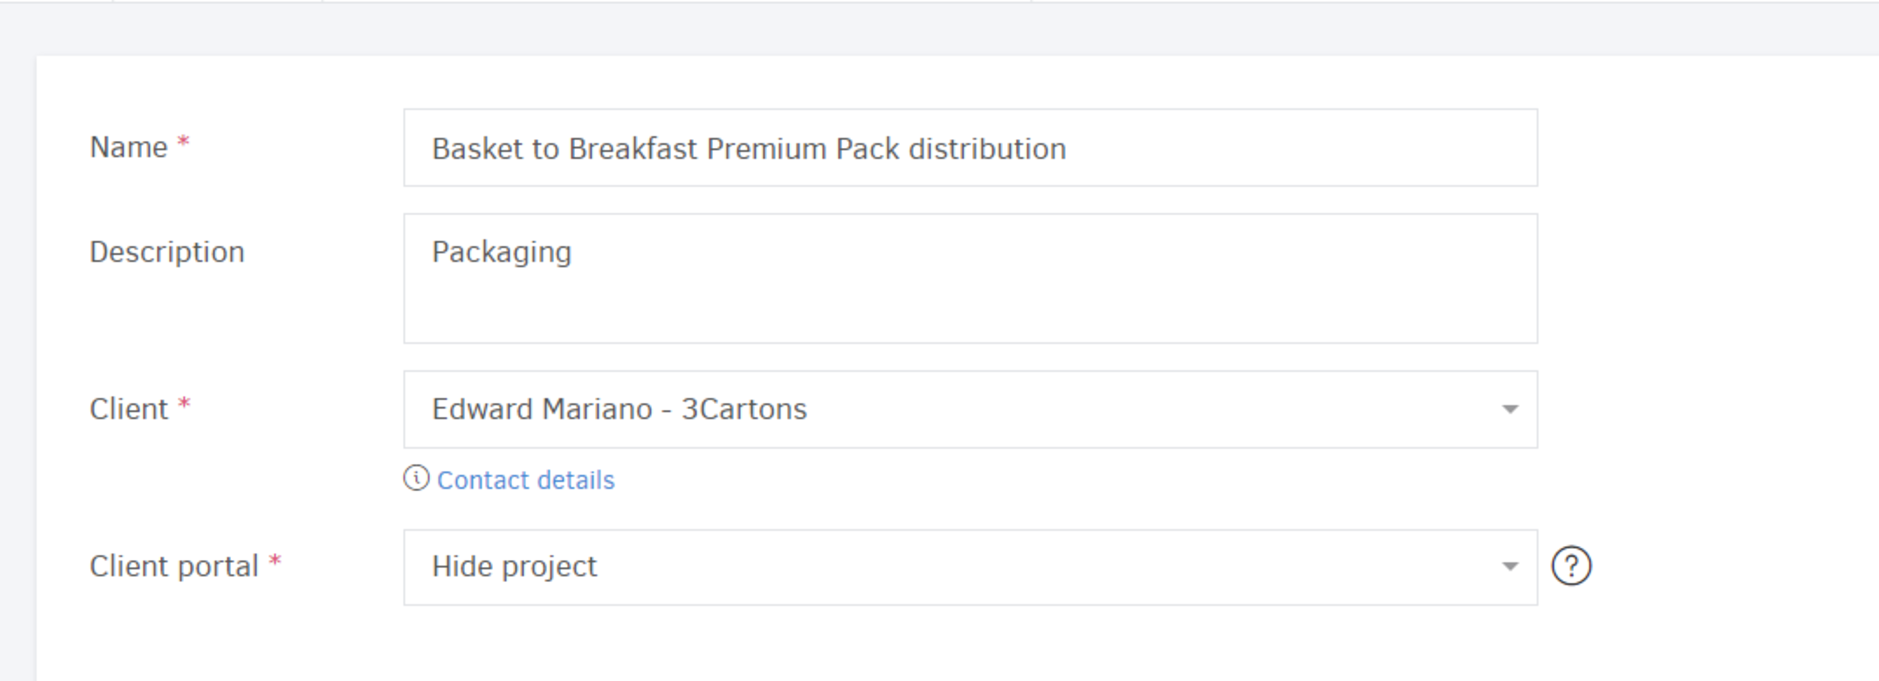
To add a project, go to Projects > Add and complete the following fields:
-
Name (required): A clear title for the project (e.g. Website makeover)
-
Description (optional): Additional context or project details.
-
Client (required): The contact for whom the project is being delivered.
-
Client portal: If enabled, clients can view project progress and tracked hours via the client portal. You can also share Attachments (files related to the Project) and start Discussions.
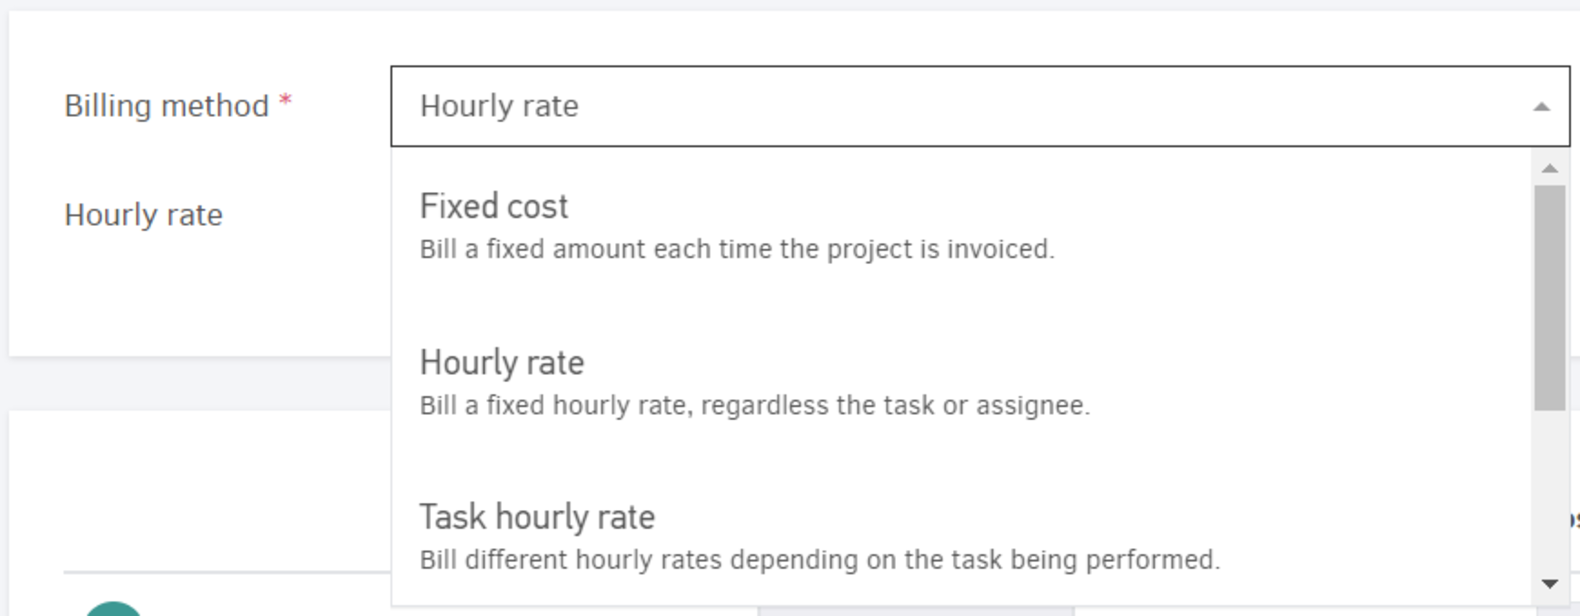
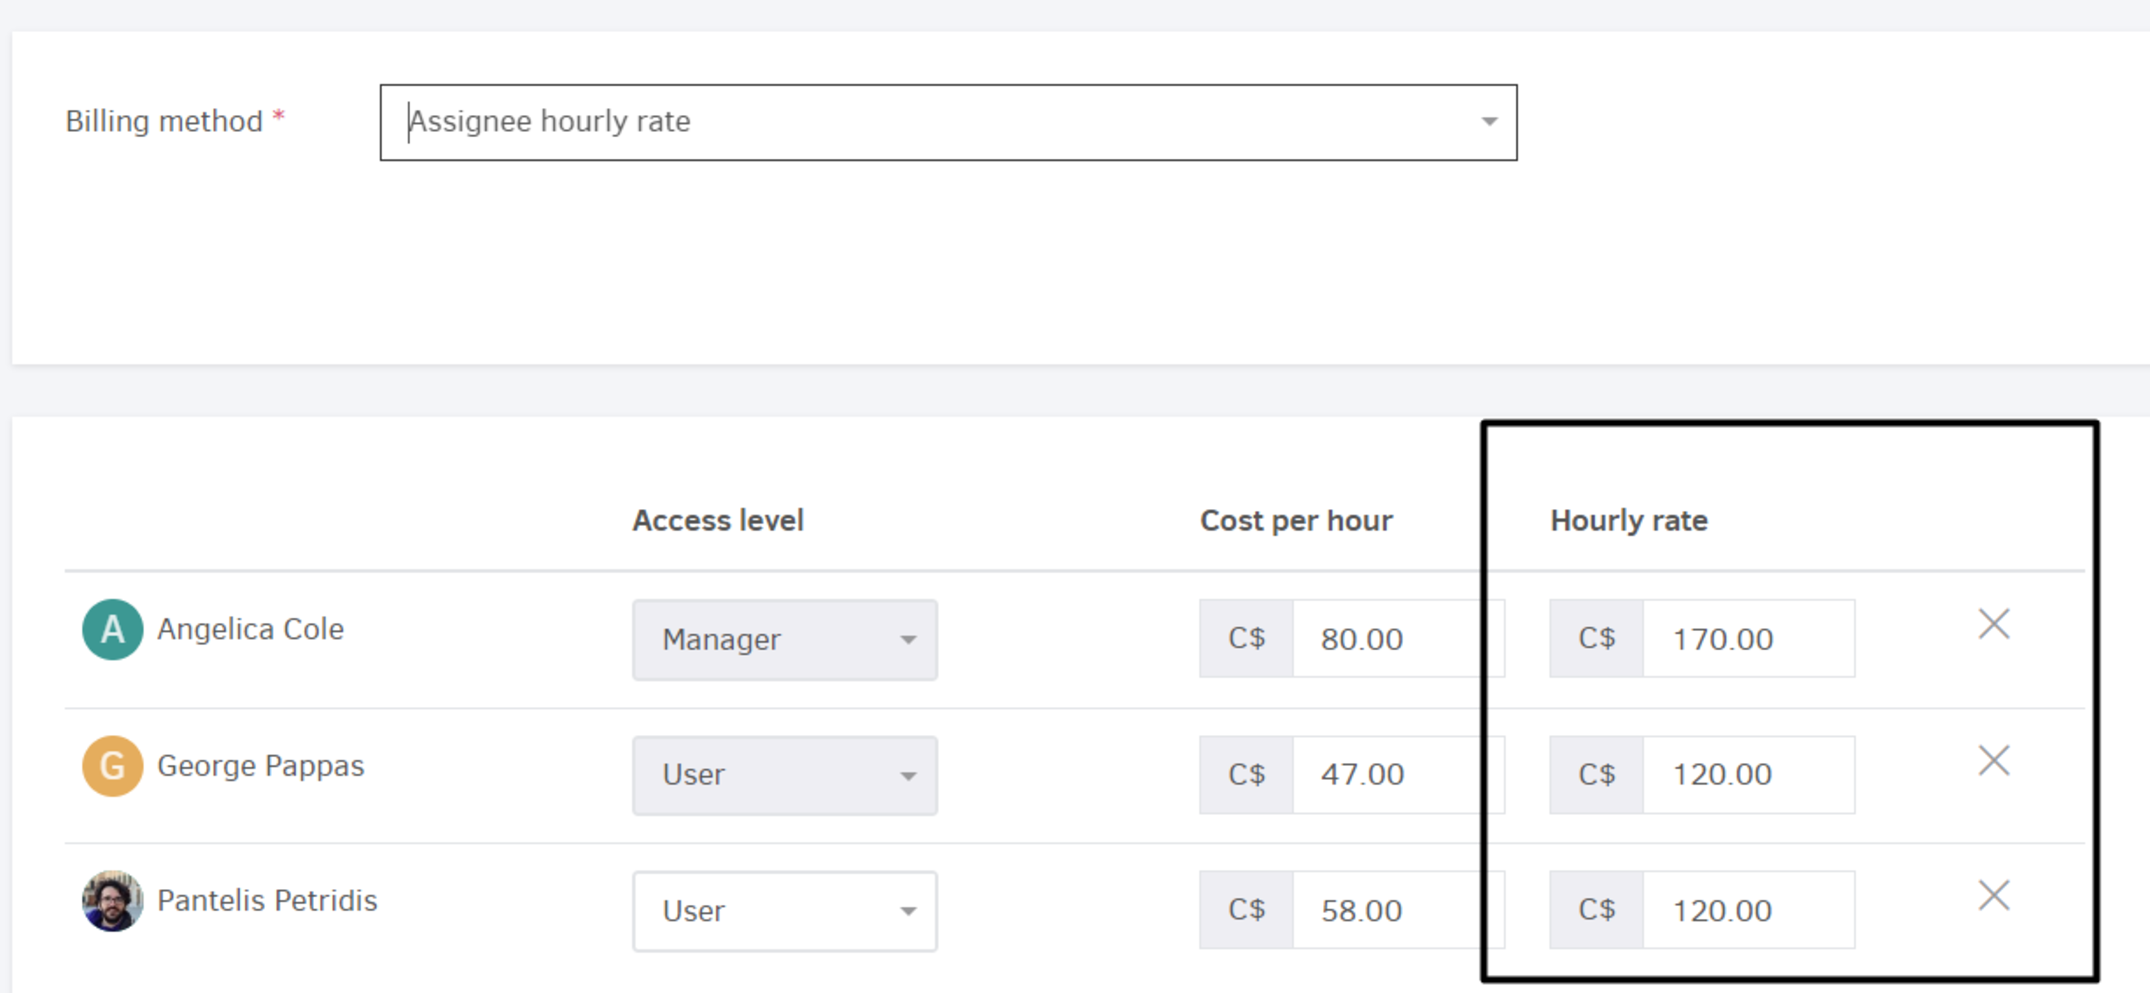
Billing method
You can choose how thw project will be billed:
-
Fixed cost: A predefined total fee, regardless of time or expenses logged.
-
Hourly rate: A flat fee per hour worked, set in the field below.
-
Task hourly rate: Billing is based on each task's hourly rate. You can set this when adding a task.
-
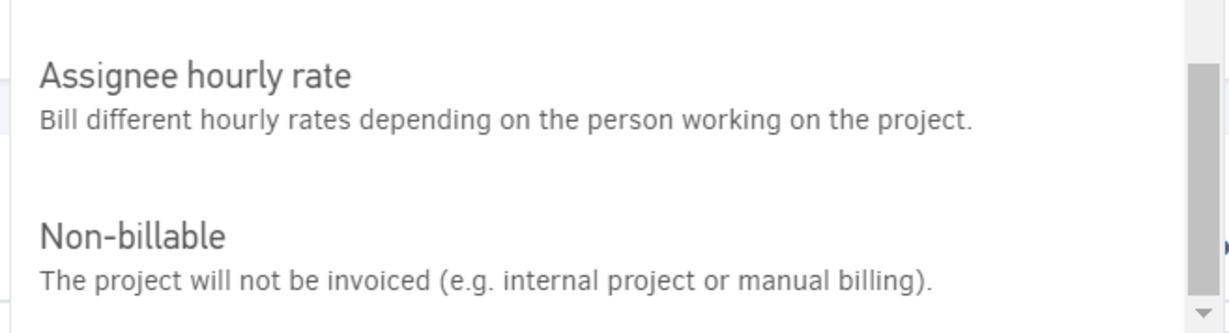
Assignee hourly rate: Each team member has a specific rate. You can define this per user in the Users section or override it per project.
-
Non-billable: Select this for internal projects where no billing occurs.
If you choose Hourly rate, the hourly rate field will appear directly below for you to enter the amount.

Project members
Next, assign team members responsible for the project. They can tracktime and view project progress, depending on their access level.
Search for a user and click Add to include them as part of the project team.

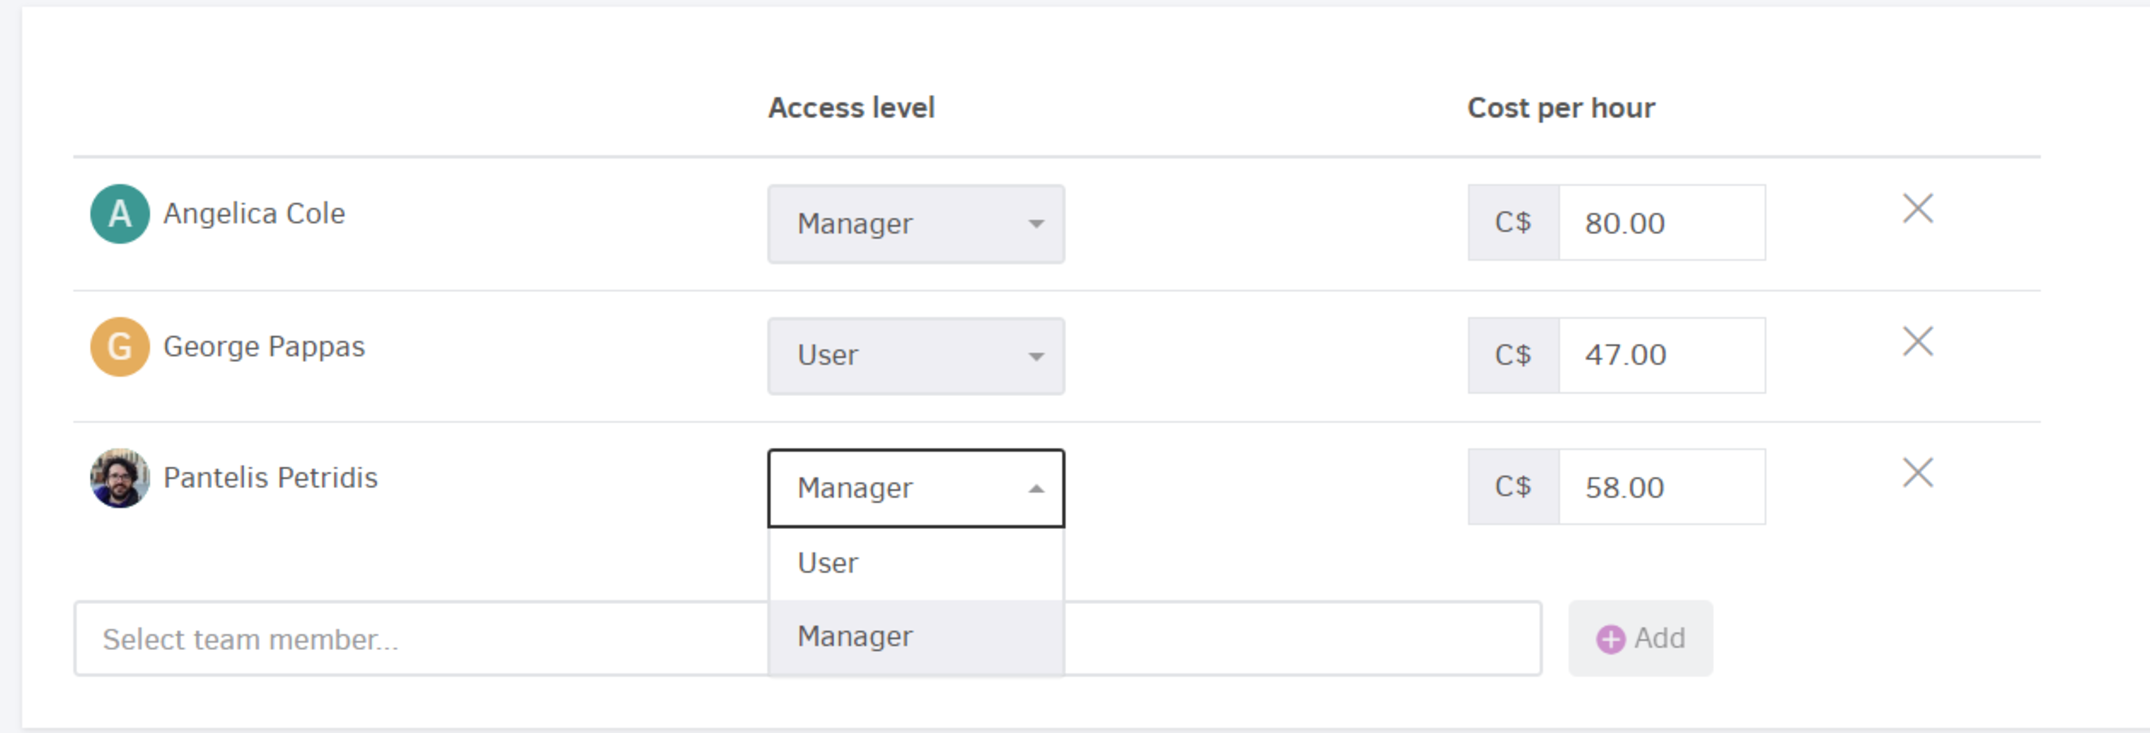
Access level
Each team member can be assigned one of two roles:
Manager: Full access to the project: time entries, billing, expenses, and reporting. Can log/edit entries for others (permissions apply).
User: Can view and manage only their own time entries, with no access to financial details.
Organization-wide Administrators and Business Managers automatically gain full access to all projects. Project Managers must be added as team members.
For custom roles and more on permissions, see the relevant article.
Cost per hour
Regardless of billing method, you can define the Cost per hour for each team member. Elorus will use this to calculate the internal cost of the project based on logged time.
You can also set a default hourly rate when adding or editing a user (via the Settings > Users & roles menu).
Hourly rate
A default hourly rate can be set for all users (via the Settings > Users & roles menu).
If the billing method is Assignee hourly rate, individual rates can also be adjusted per project.
Project Tasks
Within a project, you can perform time tracking alongside tasks. These records typically represent parts of the project and may be recorded at the organization level or assigned to a specific project.
To define tasks that will be used exclusively within a project, click on +Add new.
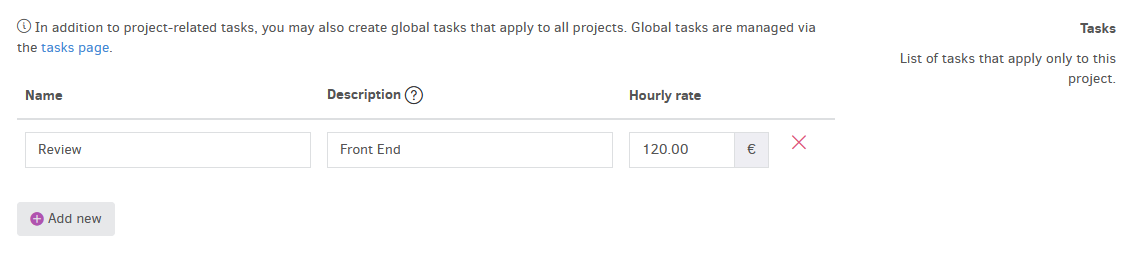
The Name appears during time tracking and in reports.
The Description is an optional detail for internal use and project invoicing.
The Hourly rate field is visible only when the billing method is Task hourly rate.
To manage tasks across your organization (and use them across multiple projects), see the relevant article.
Tracking categories
Just like with Sales, Expenses & purchases, and Contacts, you can assign Tracking categories to Projects. This allows for flexible reporting and custom grouping of project data based on your organizational needs.
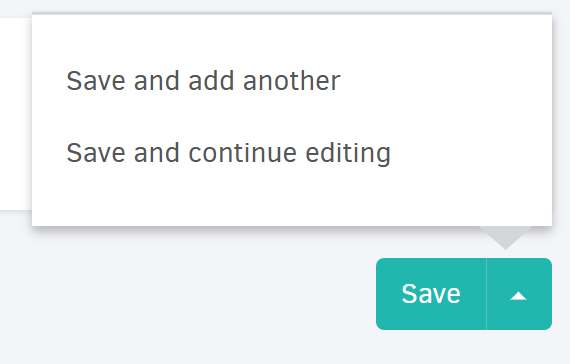
Save
By clicking Save, the Project is created and you're ready to start logging time and expenses.
Click Save and add another to quickly create more projects or choose Save and continue editing to remain on the page and make further changes.