

Every new Elorus account comes with a default template titled Default, which you can edit and use right away.
All settings related to the appearance of your documents are saved through templates, allowing you to customize how your documents look by adding a logo, selecting different colors, and (pre)filling notes in the available free-text fields.
When creating a new document, you can select the template you want to use so that the document is initialized with the settings defined in that template. This allows you to apply a different appearance per document, which is especially useful if your business operates under multiple brands or activities, or when you need to issue documents in different languages.
To manage your available templates, go to Settings > Templates.
Each template defines the appearance of documents, not the document type of each entry. The document type is defined through a separate field. You can find more details on this in the relevant article.
Add templates
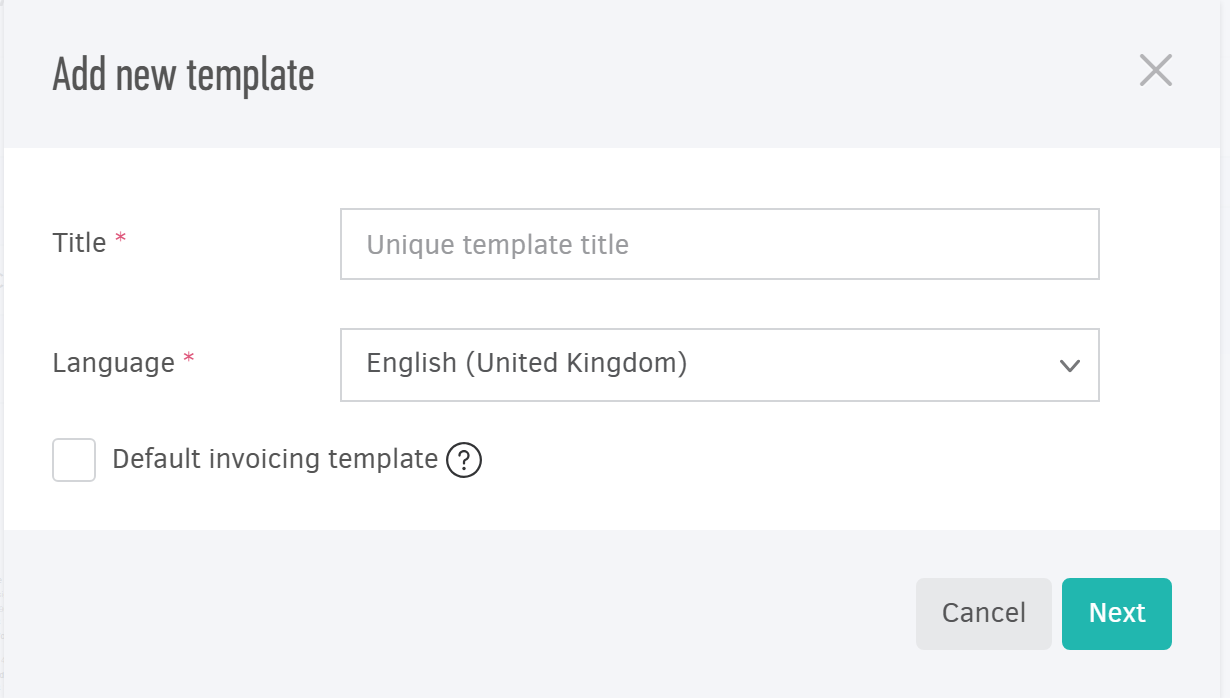
You can create an unlimited number of templates, depending on your needs. From Settings > Templates, click +Add to get started. You’ll first be asked to define:
- Title
- Language
- Whether it will be set as Default. The default template is used during automatic document creation (for example, when invoicing estimates) and is preselected in document creation forms.
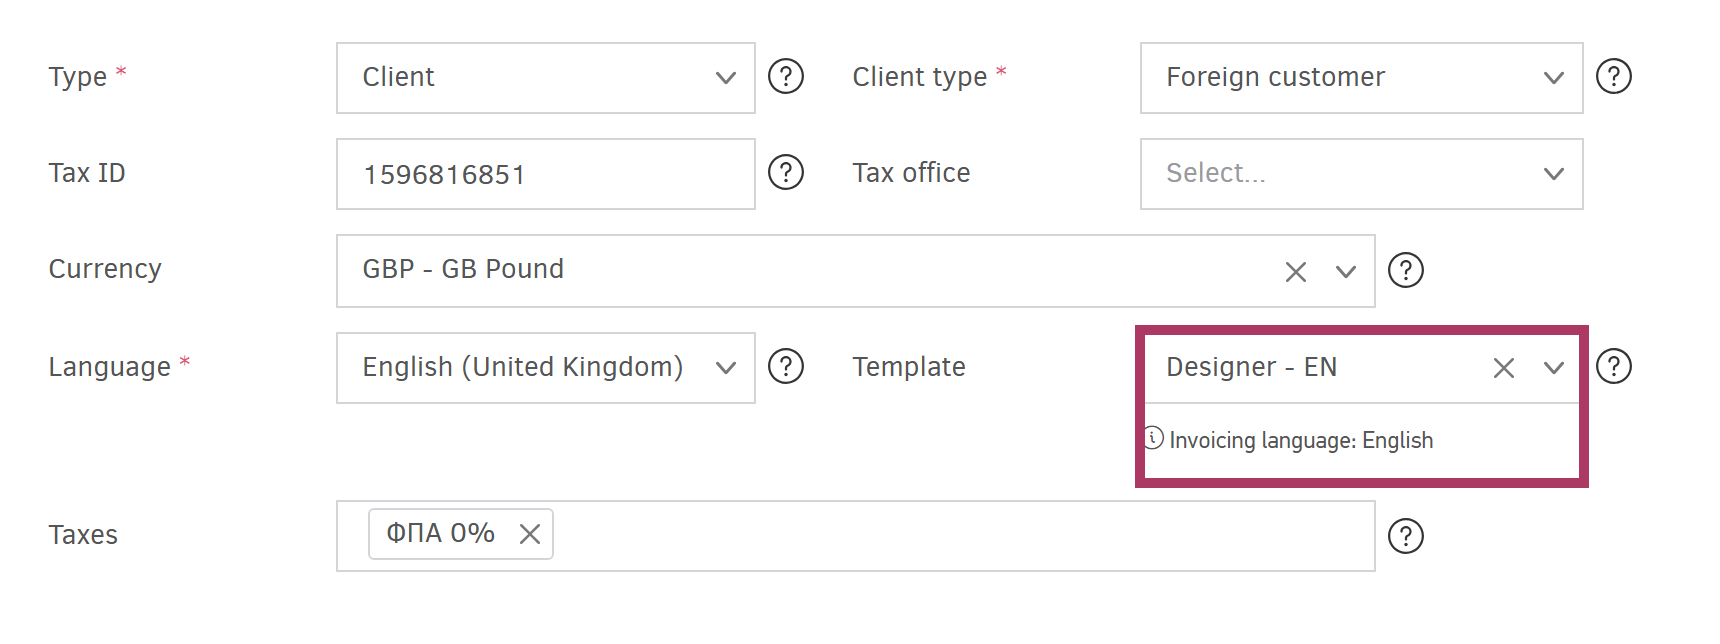
Default template per contact: You can set a default template for each contact, provided that you have already created more than one template. Inside every contact, choose the desired one from the drop-down list in the Template field.
By clicking Next, you will be taken to a sample template where you'll be able to configure the appearance options and preview how your official documents will look before finalizing the settings.
The printable page size is automatically set by the system based on your geographic region (A4 or US letter). However, you can change this setting manually if needed.
To see how you can create a template by reusing an existing one, try the Copy option, as described in the last section of this guide.
The document title Invoice is indicative. For example, if you issue a Service Invoice, the title will be adjusted accordingly. Templates apply to all document types in Elorus.
General information
By clicking on the various fields marked with a pencil icon, you can enter your own information using the editing panel on the right side of the preview.
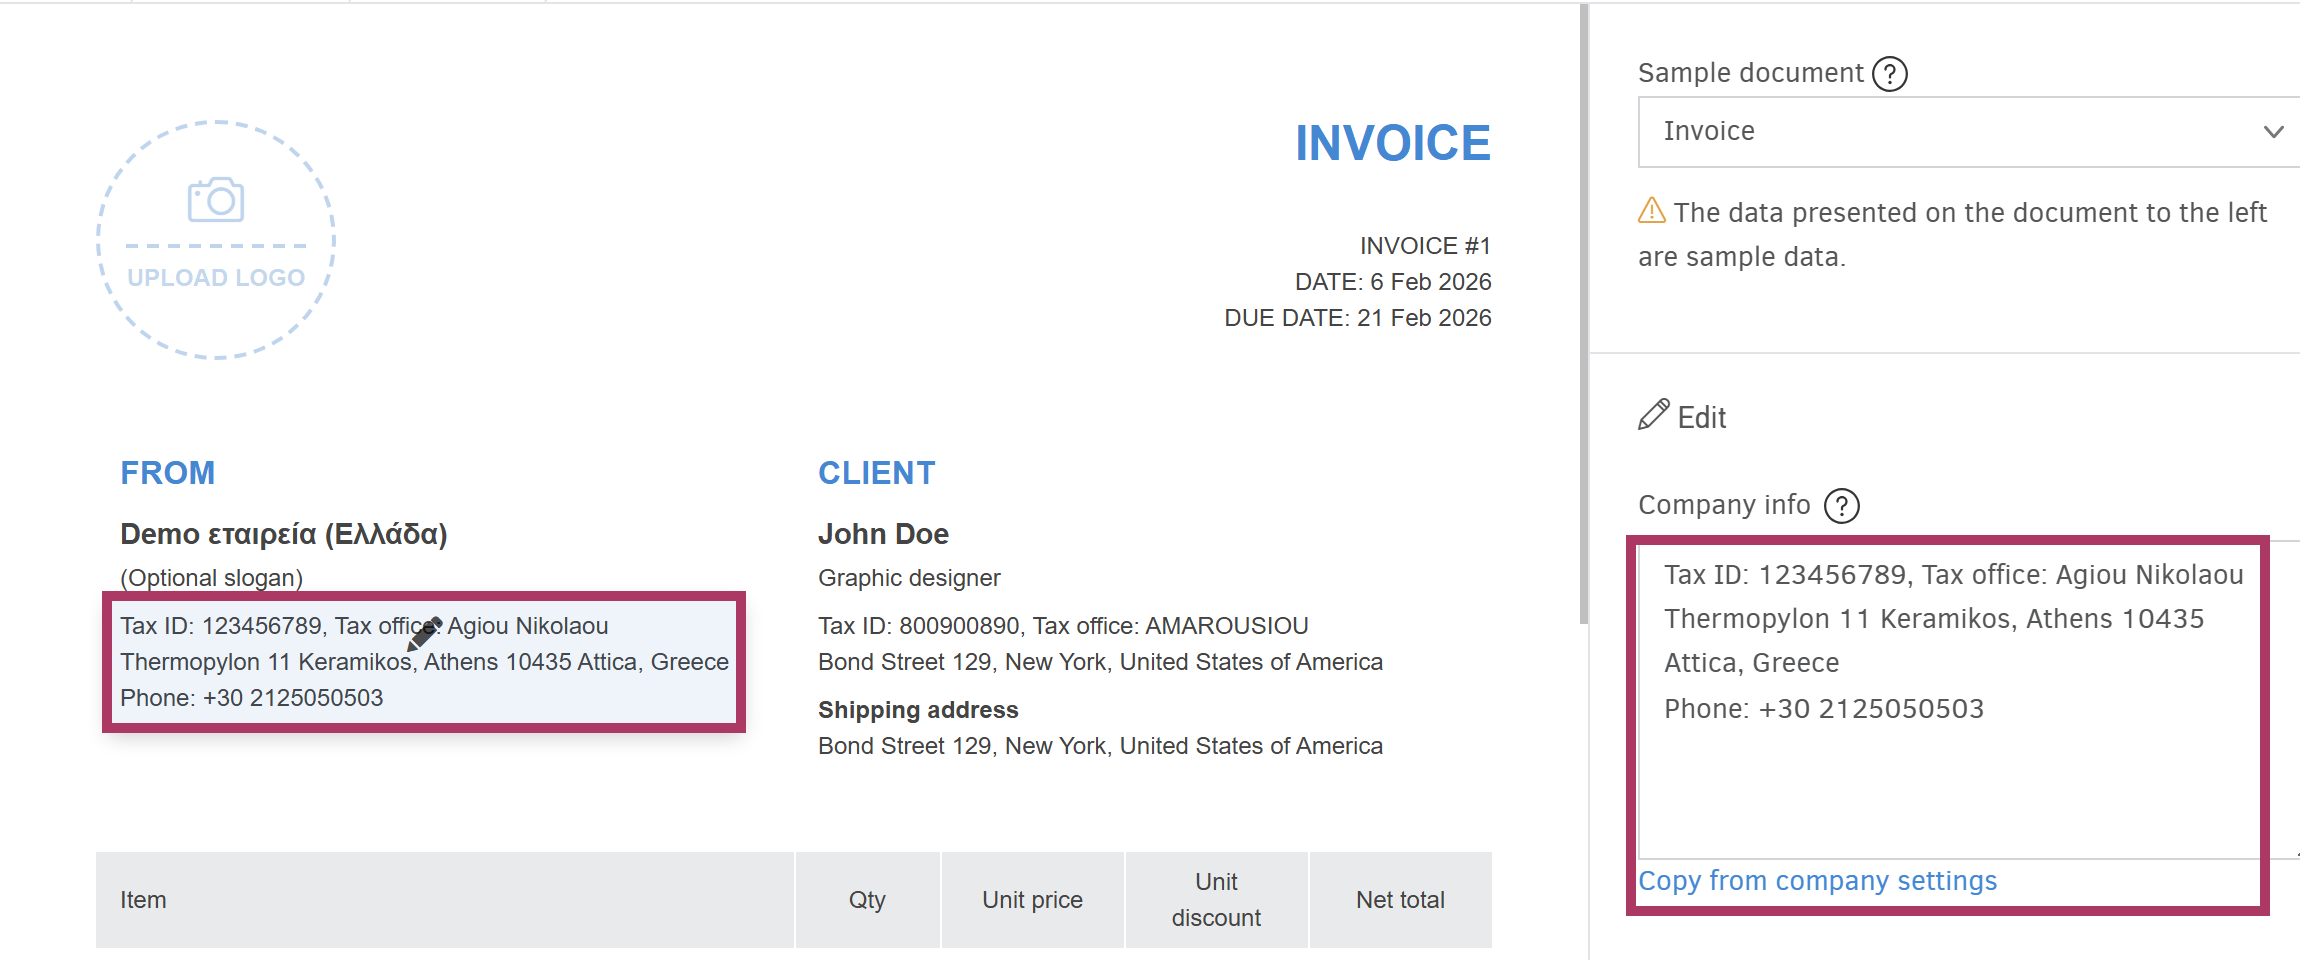
Company information
This field originally contains your company information you provided in the Company Settings. You can alter the information as you wish inside the template, without affecting your settings. You may add your registration number or create several templates under different company info, in case your firm has several fields of activity or branches, for example.
In the Translations field, you can enter the company name in all languages supported by the application.
Logo
The logo that appears on your documents. Image files (JPEG, PNG) and SVG files are supported. The optimal logo dimensions are 960×540 pixels. If your file is larger, Elorus will automatically resize it to these dimensions.
![]()
Slogan / Brand tagline
Your business activity or a slogan, exactly as you want it to appear on your documents.
Electronic signature
You can upload an image file of your scanned signature or your company stamp.
Design settings
In addition to entering text and images where allowed, you can also adjust the design details of your documents. The main options are:
.png)
- Layout: The overall structure of the document. Elorus currently provides a library of four layouts to choose from.
- Variation: Each layout includes a set of color variations. Choose the one that best matches your brand identity.
- Font size: Select between small, normal, and large font sizes.
Content settings

Creator's personal information
If enabled, the document will display the full name, email address, and phone number of the user who created it. This information is pulled from the user’s Elorus profile.
Client's personal information
If enabled, the document will display the personal details (name, phone number, email) defined in the customer’s contact record.
Exchange rate
Elorus will display the exchange rate on documents when the currency differs.
Related estimate
If enabled, the number of the related estimate will appear on the printable document, provided an estimate was issued beforehand.
Line items table
You can show or hide the various columns of the Products / Services table, such as:
- Description
- Product code
- Quantity
- Unit of measurement: Specify if and how you wish the measurement unit column to appear on the documents.
- Unit discount (as value, percentage, or as dictated by the line item)
- Line amounts (Tax exclusive or Tax inclusive):
- Tax exclusive with the available options Unit price before discount (net) &
Line total (net). - Tax inclusive with the available options Unit price before discount (gross),
Unit price after discount (gross), Line total (gross).
- Tax exclusive with the available options Unit price before discount (net) &


- VAT
- Discount (as an amount, percentage, or as defined per line item)
-
Hiding the Discount column applies only when no product or service includes a discount.
-
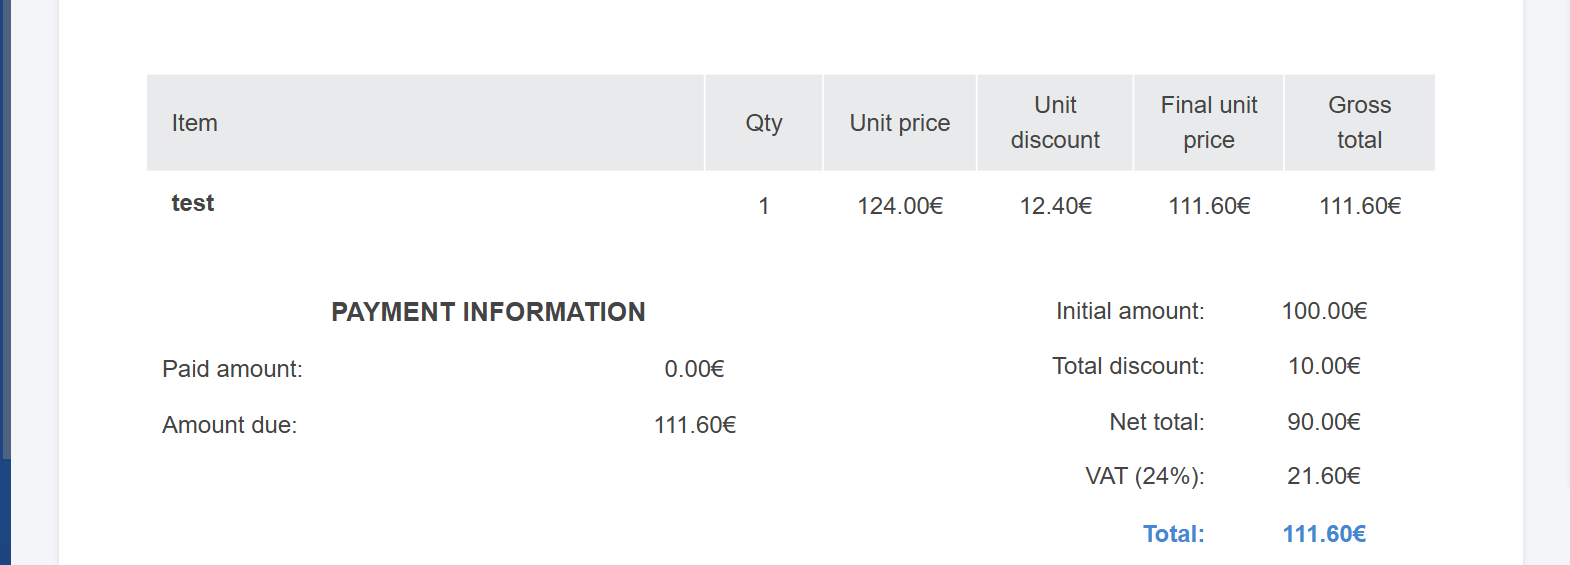
When the Line amounts: Tax inclusive and Discount columns are enabled — and the discount is displayed as an amount rather than a percentage — Elorus now shows the gross discount amount.
As a result, the Final unit price matches the Gross total column, providing greater clarity to your clients.
Summary table
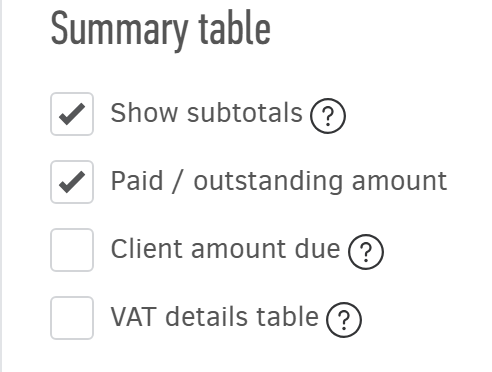
Show subtotals
Show / hide the initial amount, total discount, net total and taxes.
Paid / outstanding amount
Show or hide the paid / unpaid amount for a specific document. These values reflect the balances at the time of printing or sending.
Client amount due
Show or hide the customer’s total balance on the printable version of the document.
VAT details table
The VAT table analyzes the amounts of each VAT rate found on the document.
Notes, Terms & Conditions
You can have separate notes or terms and conditions for each document category. For example, you may have different terms for invoices, credit notes, and estimates.
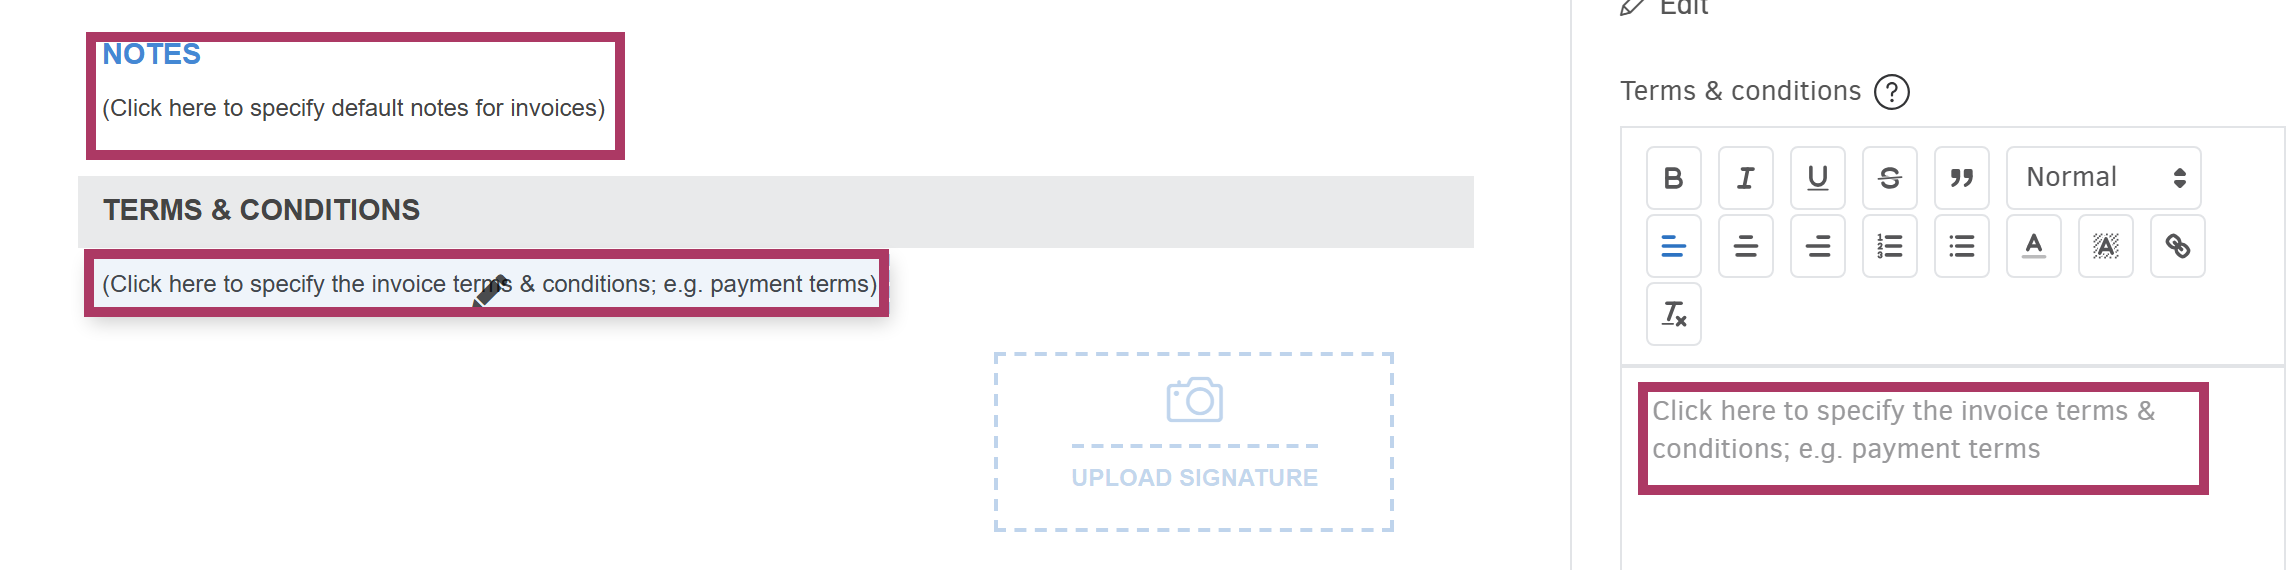
Simply select the document category for which you want to define notes using the Sample Document field.
Then, click the Terms & conditions field in the sample document and enter your text in the editing panel. Here you can include any information related to your company’s transaction policy, as well as payment methods or payment deadlines.
The sample uses one of the available document types per category. The document title is determined by the document type selected during creation.